Roof Replacement Steps for Puget Sound Homeowners
A roof replacement is more than removing old shingles and putting on new ones. Once the old roof comes off, it can reveal hidden soft spots, moisture damage, worn flashing, or deck rot that was not visible from the ground. For Puget Sound homeowners, these discoveries are especially important because months of rain, high humidity, wind, and moss growth can slowly affect the layers beneath the roof surface.
Understanding the roof replacement steps before work begins can make the project feel far less uncertain. You will know why a thorough inspection comes first, what happens during the tear-off, and why a contractor may need to repair damaged roof decking before installing new materials. You can also prepare for practical details, such as noise, driveway access, debris removal, permits, and possible weather-related schedule changes. Knowing what is normal helps homeowners and property managers ask informed questions and make decisions with greater confidence.
A new roof protects much more than the exterior of your home. It helps keep water out of the attic, insulation, ceilings, and walls, where moisture can lead to expensive repairs over time. The materials and installation details matter just as much as the visible shingles. Quality underlayment installation, secure flashing around chimneys and vents, properly built valleys, and balanced roof ventilation all work together to manage water and attic moisture. These details can support the lifespan and performance of a roof through the long wet seasons common in western Washington.
The roof replacement process also requires realistic expectations about timing. A typical project may move quickly when conditions are dry and the roof deck is in good shape. However, rain, wind, permit requirements, material availability, or unexpected damage found during tear-off can affect the roof replacement timeline. A clear plan for weather protection and communication helps ensure your home stays protected while work is underway.
Choosing roofing materials is another key part of the project. Homeowners should consider products suited to local moisture, the slope and design of the roof, ventilation needs, appearance, budget, and manufacturer requirements. Reviewing roofing materials for a new roof before making a final choice can help clarify which options fit your home and local conditions.
This guide walks through the steps to replace a roof from the first inspection to final cleanup and walkthrough. You will learn what to expect during tear-off, roof deck inspection, underlayment and flashing installation, shingle installation, ventilation work, and the final roof inspection. It will also cover the questions to ask before the project starts, so you can better understand the scope of work, prepare your property, and move forward with a clear picture of how roof replacement works.
Why Understanding Roof Replacement Steps Matters
A roof replacement is more than placing new shingles over an old surface. It is a planned process that protects the roof structure, manages water, supports ventilation, and creates a finished system designed for local weather conditions.
For Puget Sound homeowners, understanding the roof replacement steps helps make the project less stressful. You will know why a contractor may pause for rain, why damaged plywood can change the scope of work, and why details such as flashing and underlayment deserve close attention.
A clear process also helps property managers and investors plan around tenant access, parking, debris removal, and possible schedule changes. The right questions early in the project can prevent confusion later. A detailed roof replacement guide can also help you compare what different roofing projects may involve.
How Puget Sound Weather Affects Roof Replacement
The roof replacement process in western Washington has unique challenges. Heavy rain, damp air, wind, moss growth, and long wet seasons all affect how a new roof should be installed and when work can safely happen.
Roofing materials and the roof deck need appropriate conditions during installation. Contractors often watch weather forecasts closely and plan around dry windows when possible. A short weather delay may be necessary to avoid exposing the roof deck to unnecessary moisture or installing materials in unsuitable conditions.
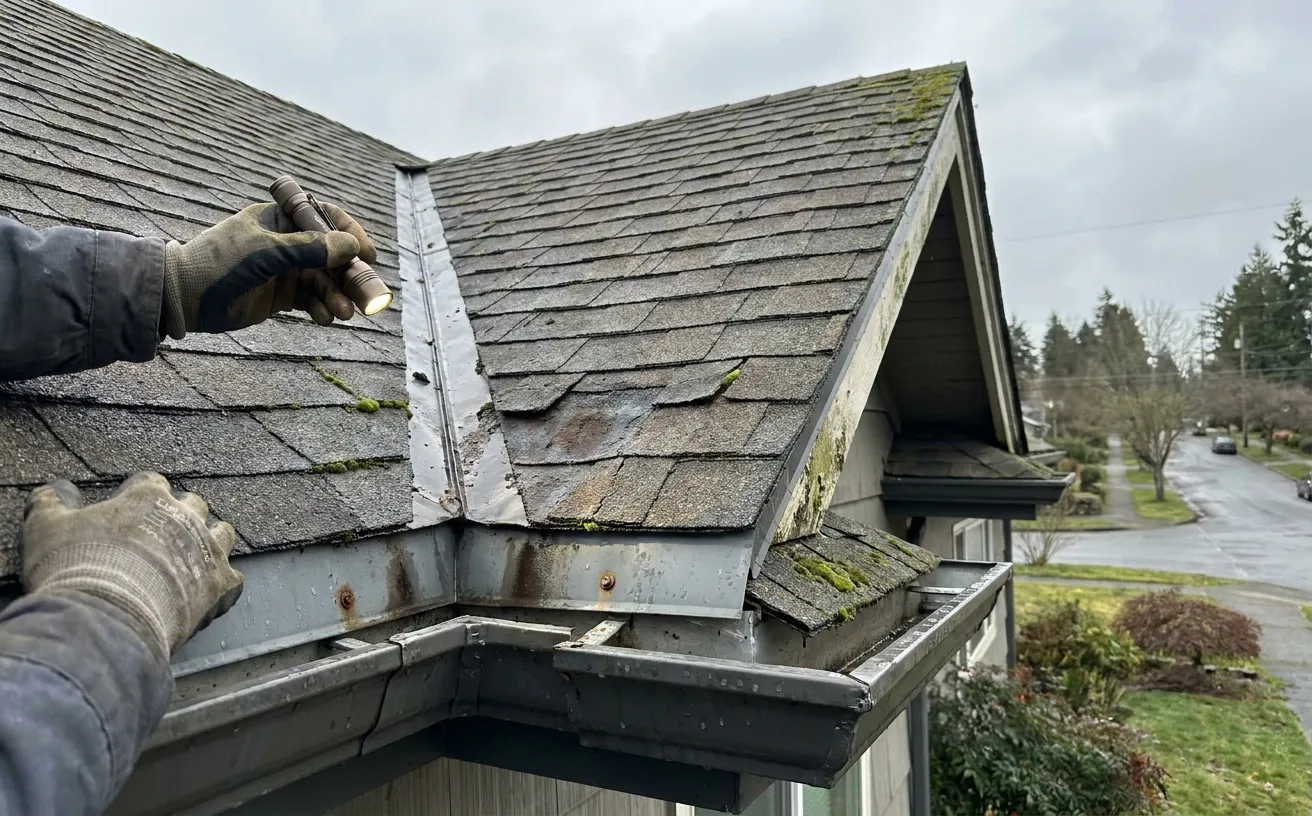
Moisture is especially important in the Puget Sound region because it can lead to problems that are not always visible from the ground. For example, a roof may appear to need only new shingles, but removing the old roofing can reveal soft plywood, rot near valleys, or moisture damage around chimneys and vents.
Clear communication matters throughout a local project. Before work begins, ask how weather delays will be handled, how the home will be protected if rain is expected, and who will provide schedule updates. These details are an important part of knowing what to expect during a roof replacement in the Pacific Northwest.
Step 1: Start With a Full Roof Inspection
The first of the roof replacement steps is a thorough inspection. This helps determine whether replacement is appropriate and identifies areas that may need repair during the project.
A professional inspection often looks at:
- Missing, cracked, curling, or worn shingles
- Moss, algae, and trapped debris
- Roof leaks or water stains near ceilings
- Flashing around chimneys, skylights, wall connections, and vents
- Valleys, which direct a large amount of water off the roof
- Gutters and drainage paths
- Signs of sagging or soft spots
- Attic moisture, insulation condition, and ventilation
An attic check is valuable because the underside of the roof can reveal issues not visible outside. Dark staining, damp insulation, mildew odors, or rusty nails may point to condensation or a roof leak. These signs do not always mean the entire roof structure is damaged, but they should be addressed before a new roof is installed.
Scheduling a roof inspection gives homeowners a clearer view of the roof’s condition and helps create a more accurate project plan. Once the inspection is complete, the next step is choosing materials that fit the home and the local climate.
Step 2: Choose Roofing Materials for Local Conditions
Roofing materials affect appearance, maintenance needs, durability, weight, and cost. The best choice depends on the roof slope, the home’s design, neighborhood requirements, budget, and exposure to weather.
Asphalt shingles are a common choice because they work well on many homes and come in many colors and styles. Other roofing materials may be suitable for certain roof designs, especially when homeowners are considering metal, low-slope roofing, or architectural shingles.
When comparing options, consider:
- Water-shedding ability during frequent rain
- Wind resistance for exposed locations
- Compatibility with the existing roof structure
- Moss and debris maintenance needs
- Manufacturer warranty requirements
- Appearance alongside siding, trim, and nearby homes
- Long-term maintenance and replacement planning
Moss does not always mean a roof needs replacement, but heavy moss can hold moisture against roofing materials and hide shingle wear. Keeping branches trimmed back and clearing roof debris can help limit future buildup.
For more help evaluating local options, review roofing materials for a new roof. After materials are selected, the contractor can move into permitting, scheduling, and detailed project planning.
Step 3: Plan Permits, Schedule, and Scope of Work
A roof permit may be required depending on the property location and the project scope. Permit rules can vary by city and county, particularly if structural repairs, major changes, or certain roofing systems are involved. A contractor should explain who is responsible for permit applications, inspections, and related paperwork before work begins.
The project plan should also describe the expected roof replacement timeline. Timing can change due to weather, material availability, roof size, roof pitch, access, and hidden damage found after tear-off.
Before the scheduled date, confirm practical details such as:
- The planned start date and typical work hours
- How weather delays will be communicated
- Dumpster or trailer placement
- Driveway and parking needs
- Protection for landscaping, decks, and outdoor items
- Whether the project includes gutter work
- Possible costs for damaged roof decking or other concealed repairs
- Payment schedule and warranty documents
Questions to ask a roofing contractor before roof replacement should include how the roof will be protected overnight if needed and how change orders are handled. A change order is written documentation of work outside the original scope, such as replacing rotten plywood found under the old roof.
Homeowners can use these questions to ask roofing contractors to prepare for a clear planning conversation. Once the schedule is set, preparing the property makes the workday safer and more efficient.
Step 4: Prepare the Home and Property
Roofing work is noisy and creates vibration. Preparing the home helps reduce avoidable damage and disruption.
Move vehicles away from the garage and driveway if requested so workers can access the roof and debris containers. Remove patio furniture, grills, potted plants, and fragile yard decorations from areas around the home. Cover or move items stored in the attic because dust and small particles can fall through gaps during a roof tear-off.
Inside the home, take down fragile wall decorations if they could shift from vibration. Let children, pets, tenants, and neighbors know the work schedule. Property managers should also plan for access to shared driveways, parking areas, and entry points.
Tree branches that touch or overhang the roof may need attention before installation. They can block worker access, scrape new roofing materials, and keep leaves and moisture on the roof. With the property prepared, the hands-on steps to replace a roof can begin.
Step 5: Roof Tear-Off and Removal of Old Roofing
A roof tear-off involves removing old shingles or other roofing materials down to the roof deck, which is usually plywood or oriented strand board. While some projects may involve installing over an existing roof layer where local rules and roof conditions allow, a full tear-off gives the clearest view of the structure underneath.
During tear-off, crews remove old materials, nails, damaged flashing, and worn underlayment. Debris is placed in a designated container or managed through controlled cleanup procedures.
This stage can be loud, and it is normal to hear scraping, hammering, and materials being moved across the roof. The old roof may come off in sections so the crew can inspect, repair, and protect each area as work moves forward.
A tear-off is one reason estimates may include an allowance for deck repairs. Until old roofing is removed, nobody can fully see the condition of the wood below. The next step focuses on that important structural layer.
Step 6: Complete the Roof Deck Inspection and Repair
The roof deck is the solid surface that supports the roofing system. New shingles cannot perform as intended if they are installed over weak, wet, or damaged decking.
After tear-off, the crew checks for:
- Soft or spongy areas
- Rotting plywood or broken panels
- Delamination, where plywood layers separate
- Gaps or improper fastening
- Water damage near chimneys, valleys, skylights, and vents
- Signs of past leaks or attic moisture
In the Puget Sound region, deck inspection is particularly important because ongoing moisture can damage wood over time. A leak around flashing may have been small enough to go unnoticed inside the home but still leave a soft area in the roof deck.
If repairs are needed, the contractor should show or explain the issue, identify the affected area, and document the added work before proceeding. Replacing damaged decking gives the new roofing system a stable base. Once that base is ready, water protection layers can be installed.
Step 7: Install Underlayment and Moisture Protection
Underlayment installation is one of the most important new roof installation steps. Underlayment is a protective layer placed between the roof deck and the visible roofing material. It provides a secondary barrier against water that gets past shingles during wind-driven rain or other harsh weather.
Moisture-resistant underlayment is especially useful in western Washington, where roofs often remain damp for long periods. It helps protect the roof deck while the roofing material sheds water from above.
Some roof areas may also receive ice and water shield, a self-adhering waterproof membrane. Despite its name, this material can be useful in rainy climates because it provides extra protection in areas more likely to collect or channel water, including:
- Valleys
- Eaves and lower roof edges
- Around skylights
- Near chimneys
- Roof-to-wall connections
- Other vulnerable transitions
The exact materials and placement should match the roof design, local requirements, and manufacturer instructions. With the roof deck protected, crews can focus on flashing, which handles many of the roof’s most leak-prone areas.
Step 8: Install Flashing Around Roof Openings and Transitions
Flashing installation is the process of placing metal or other approved materials where the roof meets a vertical surface or has an opening. Flashing directs water away from seams that shingles alone cannot reliably protect.
Common flashing locations include chimneys, plumbing vents, skylights, dormers, roof valleys, and walls. Step flashing, for example, is layered with shingles where a sloped roof meets a wall. This layering guides water down and away from the joint.
Reusing old flashing is not always appropriate. Worn, rusted, bent, or poorly integrated flashing can create a weak point in an otherwise new roof. A careful flashing plan is especially important for homes that see wind-driven rain, which is common around the Puget Sound region.
After flashing is placed and integrated with the underlayment, the visible roof covering can be installed.
Step 9: Install Shingles or Other Roofing Materials
Shingle installation starts at the lower roof edge and moves upward in overlapping rows. This overlap is what allows water to flow down the roof instead of reaching the deck.
Crews follow the selected material’s installation instructions for fastening, alignment, starter strips, valleys, and ridge details. Proper nail placement matters because nails set too high, too low, or driven too deeply can affect shingle performance.
During this phase, workers may also replace or install:
- Drip edge at roof edges
- Pipe boot flashings around plumbing vents
- Vent components
- Valley materials
- Skylight flashing components
- New gutters, if included in the project scope
A roof should look neat and aligned when viewed from the ground, but the most important work is often in the details that are harder to see. The final installation stages address ridge protection and attic airflow.
Step 10: Finish Ridge Caps and Roof Ventilation
Ridge caps are specially designed pieces installed along the peak of a sloped roof. They provide a finished appearance while protecting the roof ridge from wind and rain.
Roof ventilation also plays a major role in roof lifespan. A balanced ventilation system helps move warm, moist air out of the attic while allowing fresh air to enter through intake vents, often located near the eaves. This airflow can help reduce condensation and attic moisture.
Poor ventilation may contribute to damp insulation, mildew, excessive heat buildup, and uneven roof aging. During replacement, the contractor should assess existing vents and discuss whether changes are needed based on the attic and roof design.
Ventilation is not a one-size-fits-all feature. The right approach depends on the home’s layout, insulation, attic space, and existing intake and exhaust paths. Once the roof system is complete, the project moves into cleanup and verification.
Step 11: Complete Roof Cleanup and Final Inspection
Roof cleanup should be an active part of the project, not an afterthought. Crews remove old materials, gather loose debris, and inspect the ground around the home for nails and small fragments. Magnetic tools are often used to collect nails from driveways, walkways, and landscaping areas.
The final roof inspection checks that the completed work matches the project scope. It may include reviewing shingles, flashing, ridge caps, vents, edges, valleys, and cleanup quality. Homeowners should also receive warranty information and instructions for maintaining the roof.
Before the crew leaves, ask about:
- The final work completed, including any deck repairs
- Warranty coverage for materials and workmanship
- Recommended maintenance and moss prevention
- Safe ways to clean gutters without damaging roof edges
- Signs that may call for future roof repair
- Who to contact with post-project questions
A new roof still benefits from regular care. Keep gutters clear, remove loose branches and debris, and arrange periodic inspections after major storms or when you notice possible roof leaks.
How Long Does Roof Replacement Take in Puget Sound?
Many standard residential roofing projects can be completed within a few working days, but the answer to “how long does roof replacement take in Puget Sound?” depends on the home and the weather.
A simple, accessible roof with limited repairs may move quickly. A larger home, steep roof, multiple skylights, complex valleys, extensive decking repairs, or rain interruptions can extend the timeline. Permit processing and material delivery can also affect the start date.
The roof replacement timeline is best viewed as a working plan rather than a fixed promise. Ask your contractor for the expected sequence of work, what conditions would cause a delay, and how your home will be secured if the forecast changes.
Questions to Ask Before and After a Roof Replacement
Good communication helps homeowners understand how roof replacement works and what they are paying for. Ask direct questions before the project begins, especially when comparing proposals.
Before Work Begins
- Does the estimate include tear-off, disposal, underlayment, flashing, and ventilation?
- What roofing materials will be installed, and why are they suitable for this roof?
- Is a roof permit required, and who handles it?
- How are hidden deck repairs priced and approved?
- What is the plan for rain, wind, or unexpected weather delays?
- How will landscaping, gutters, siding, and outdoor items be protected?
- What warranties apply to materials and installation?
After Work Is Complete
- Were any repairs found during the roof deck inspection?
- Are there maintenance steps for moss, gutters, or nearby trees?
- Is attic ventilation adequate for the new roof system?
- What documentation should be kept for future property records?
- When should the roof be inspected again?
For homeowners who are ready to discuss their own roof replacement steps from inspection to cleanup, book an appointment with Roof Pros NW and bring your questions, concerns, and property details to the conversation.
Conclusion
A roof replacement is a major project, but it becomes much easier to manage when you understand the steps involved. From the first inspection to the final cleanup, each stage plays a role in building a roof that can handle Puget Sound weather, protect the home structure, and support long-term performance. The process is not just about installing new shingles. It is about checking the roof deck, handling flashing correctly, adding the right underlayment, and making sure ventilation and drainage work as they should.
For homeowners, this knowledge helps reduce stress and makes estimates easier to compare. For property managers and investors, it also helps with planning around schedules, tenant access, cleanup, and possible hidden repairs. A clear understanding of the process can also prevent surprises if weather delays, damaged decking, or extra flashing work change the project scope. In a region with frequent rain, moisture, and moss growth, those details matter more than many people expect.
The most important first step is a full inspection. That is where hidden problems often show up, such as soft plywood, attic moisture, worn flashing, or roof leaks that were not obvious from the ground. If you are trying to decide whether repair or replacement is the better option, a professional inspection can give you a clearer picture of the roof’s condition before work begins. A detailed roof inspection is one of the best ways to start.
Material choice also matters. The right roofing product should fit the home’s style, roof slope, budget, and weather exposure. In western Washington, homeowners should think about water resistance, wind performance, moss buildup, and how easy the roof will be to maintain over time. If you are comparing options, this roof replacement guide and these roofing materials for a new roof can help you prepare better questions for your contractor.
Planning is another key part of the job. Permits, timing, weather delays, and change orders should be discussed before the work starts so there is less confusion later. Good communication during the project helps protect your property and keeps everyone on the same page. If you are still comparing contractors, these questions to ask roofing contractors can help you feel more prepared.
A roof replacement is a chance to strengthen the whole roofing system, not just refresh its appearance. When the work is done well, the home is better protected from water damage, the roof is more likely to last longer, and future maintenance is easier to manage.
If you are noticing roof wear, leaks, moss, or storm damage, the next step is simple. Contact Roof Pros NW to talk through your roof’s condition and plan the right next move with confidence.
Knowing the roof replacement steps can make the whole project feel easier and less stressful. For Puget Sound homeowners, the process also includes local concerns like heavy rain, moisture, deck rot, and weather delays that can affect timing and materials. These key takeaways cover what to expect from start to finish so you can plan with confidence and ask the right questions before work begins.
- Start with a full roof inspection: A careful inspection helps find leaks, missing shingles, soft spots, and other damage before the replacement begins.
- Choose materials made for wet weather: In the Puget Sound, moisture-resistant underlayment and roofing materials that hold up to rain and humidity are especially important.
- Permits should be handled before work starts: Roof replacement often requires permits, so homeowners should confirm this step early to avoid delays.
- Tear-off reveals the real condition of the roof: Once the old roofing is removed, contractors can see hidden problems that were not visible from the outside.
- Deck repairs may be needed during replacement: Rot, soft spots, or damaged decking are more common in western Washington and may need repair before new materials go on.
- Flashing and underlayment help stop leaks: Proper flashing around chimneys, vents, and valleys, along with strong underlayment, helps protect the roof from water intrusion.
- Ventilation matters as much as shingles: Good ridge ventilation helps control attic moisture and supports the life of the new roof.
- Weather can affect the timeline: In the Puget Sound, rain and short dry windows can slow scheduling and installation, so clear communication with the contractor is important.
- Cleanup and final inspection should not be skipped: A complete cleanup and walkthrough help make sure the site is safe and the finished roof meets expectations.
- Ask smart questions before the project begins: Homeowners should ask about timeline, materials, permits, weather plans, and how Roof Pros NW handles unexpected deck damage or delays.
With these steps in mind, the full article will walk you through the roof replacement process in order, from inspection and tear-off to installation and final review, so you know what to expect at every stage.
Get a Clear Picture of Your Roof’s Condition
A roof inspection is a smart next step when you want to protect your home and plan ahead with confidence. Roof Pros NW can assess your roof, explain what they find in plain language, and help you understand whether maintenance, repairs, or future replacement may be needed.
- Identify worn shingles, flashing issues, and drainage concerns
- Catch small problems before they become larger repairs
- Get honest recommendations based on your roof’s condition
- Plan maintenance or replacement around your budget and timeline
- Receive answers from experienced local roofing professionals
Scheduling an inspection now can help you stay ahead of seasonal weather and avoid last-minute roofing decisions. Take the next step and book your roof inspection with Roof Pros NW today.
How do I know if I need roof repair or a full roof replacement?
A repair may be enough if the damage is limited to one area, such as a few missing shingles or a small flashing issue. A full roof replacement is often the better choice when the roof is near the end of its life, has repeated leaks, shows widespread wear, or has deck damage under the surface. In the Puget Sound area, hidden moisture damage is common, so a full inspection is the best way to know which option makes sense. Roof Pros NW can inspect the roof and explain the findings in plain language.
How long does roof replacement usually take for a residential home?
The timeline depends on roof size, slope, material choice, weather, permit needs, and whether hidden damage is found after tear-off. A simple roof can move quickly in dry weather, but repairs to decking or flashing can add time. In western Washington, rain can also affect the schedule because the crew may need to protect the home and wait for safer conditions. Roof Pros NW can review your roof and give you a clearer project timeline before work begins.
What should I ask before hiring a roofing contractor?
Ask who handles permits, what materials will be used, how weather delays are managed, what happens if deck rot is found, and what is included in cleanup and the final walkthrough. You should also ask about warranty coverage, crew schedule, and how change orders are approved. A good contractor will answer clearly and put the plan in writing. Roof Pros NW can walk you through the full process so you know what to expect.
How can I compare roofing estimates without getting overcharged?
Compare more than the final price. Look at what each estimate includes, such as tear-off, disposal, underlayment, flashing, ventilation, deck repairs, permits, and cleanup. Make sure the materials are clearly listed and that the scope of work is the same from one estimate to the next. A lower quote is not always a better value if it leaves out important steps. Roof Pros NW can provide a clear estimate and explain each part of the job.
What is included in a professional roof replacement estimate?
A professional estimate should explain the roofing materials, tear-off, disposal, underlayment, flashing, ventilation, cleanup, and any likely repair items that may be needed if hidden damage is found. It should also outline the schedule, permit responsibilities, warranty details, and how unexpected issues will be handled. If the estimate is vague, ask for more detail before you move forward. Roof Pros NW can inspect your roof and give you a detailed plan for your replacement project.
