Roof Replacement Steps: A Homeowner's Guide to the Process
A roof replacement is more than a day of new shingles going on your home. Once the old roofing is removed, the work can reveal hidden moisture, soft roof decking, worn flashing, or poor ventilation that was not visible from the ground. That is why understanding the roof replacement steps before work begins matters. You will know what questions to ask, what parts of the job protect your home, and why certain repairs or materials may be needed along the way.
For Pacific Northwest homeowners and property managers, planning is especially important. Months of rain, wind-driven storms, damp shade, and moss growth can wear down roofing materials and allow moisture to stay trapped where it does not belong. A roof may look mostly sound from the driveway while water has already worked beneath aging shingles or around a chimney. Replacing a roof without addressing those underlying issues can shorten the life of the new system. A careful roof replacement process for Puget Sound homeowners starts with a full assessment of the roof surface, attic conditions, flashing, and deck so the scope of work is as clear as possible before tear-off.
There are also practical details that can affect the schedule and budget. Permits may be required, insurance may be involved after storm damage, and wet weather can change when work can safely move forward. During the roof tear-off, a contractor may find damaged plywood or other deck repairs that need attention before the new materials are installed. While this can feel like an unexpected step, a sound, dry roof deck is the base that supports everything above it. Skipping needed repairs can leave a new roof vulnerable to future leaks, movement, and moisture problems.
The new roof installation process is built in layers, and each one has a purpose. Drip edge helps guide water away from vulnerable edges. Underlayment installation and ice and water shield add important moisture protection beneath the main roofing material. Proper flashing replacement around chimneys, skylights, valleys, and vents helps stop water from entering common leak points. Shingle installation, ridge cap installation, and roof ventilation then complete a system designed to shed water and support a healthier attic.
Just as important, the job should not end when the last shingle is installed. Cleanup, debris removal, a nail sweep, and a final walkthrough help confirm the property is left in good condition and the work has been checked. In the sections ahead, this guide explains the roof replacement stages step by step, from the first inspection and material choices to final cleanup, so you can prepare with confidence and make informed decisions for your home.
Roof Replacement Steps Homeowners Should Expect
Why a Roof Replacement Is More Than a One-Day Job
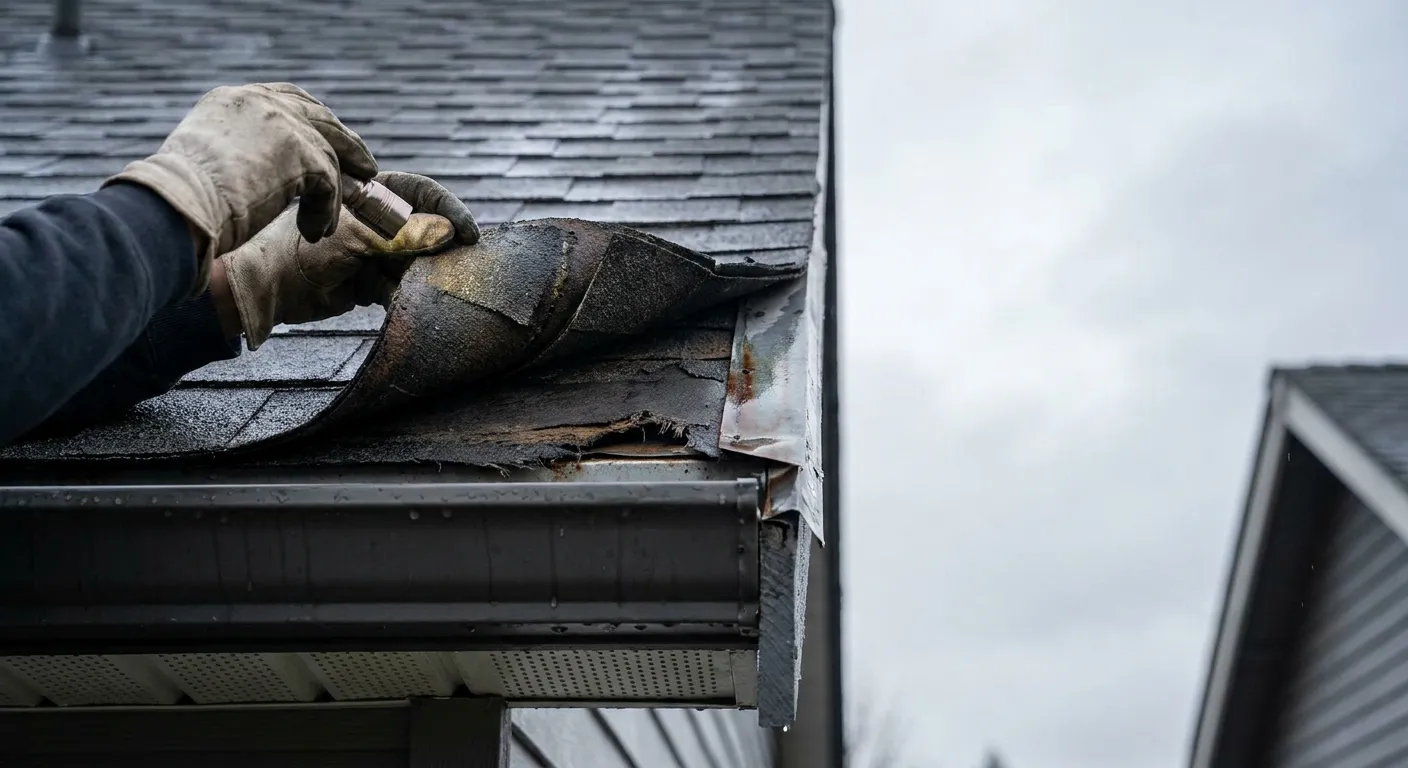
A roof replacement is a planned construction project, not simply a matter of placing new shingles over old ones. The existing roofing must usually be removed so the contractor can inspect the layers beneath it. This roof tear-off exposes the roof deck, old underlayment, flashing, and areas around vents or chimneys that may have been holding moisture.
In the Pacific Northwest, long wet seasons, wind, and moss growth can create issues that are not visible from the ground. A roof may look worn but intact until the old materials come off and reveal soft decking, rusted flashing, or moisture-stained areas below. These findings can affect the work needed, the schedule, and sometimes the final cost.
The roof replacement stages also include planning, material selection, weather coordination, installation, cleanup, and a final inspection. Knowing what happens at each stage helps homeowners, property managers, and investors make informed decisions.
What This Guide Will Help You Understand
This roof replacement process step by step for homeowners explains what to expect before work begins, during the new roof installation process, and after the crew leaves the property. It also covers common Pacific Northwest concerns, including rain delays, hidden deck damage, moss-related moisture, and attic ventilation.
A well-planned project makes it easier to ask useful questions, prepare your property, and understand why certain details matter. The first of the roof replacement steps is always learning the true condition of the existing roof.
Step 1: Start With a Full Roof Inspection
What a Roof Inspector Looks For
A full roof inspection helps determine whether a home needs repairs or a complete replacement. The inspector looks at the roof surface, edges, valleys, penetrations, and drainage areas. They may check for missing, cracked, curling, or worn shingles, along with exposed nail heads and damaged ridge caps.
Other common concerns include:
- Moss or algae growth that holds moisture against roofing materials
- Soft spots that may point to weakened decking
- Worn or loose flashing around chimneys, walls, skylights, and vent pipes
- Water stains on ceilings or exterior walls
- Damaged gutters or roof edges that do not direct water properly
An inspection should also include the attic when access is available. Damp insulation, wood staining, mildew odors, and poor airflow can all point to roofing or ventilation problems. A roof can appear acceptable from outside while moisture is affecting the materials below.
Why Hidden Damage Matters in the Pacific Northwest
Heavy rain and recurring moisture make hidden damage a major concern for Puget Sound homes. Moss can retain water, especially on shaded roof slopes. Over time, that moisture may work beneath aging shingles and underlayment. Wind-driven rain can also enter small gaps around flashing or roof penetrations.
Older roofs may have more than one layer of roofing, past repairs, or aging materials that hide the source of a leak. An inspection gives the homeowner a clearer idea of what may be found during tear-off, even though the deck cannot be fully examined until old materials are removed.
When a Roof Inspection May Lead to Repairs Before Replacement
Some conditions need attention before or during the replacement project. For example, a leaking skylight, damaged fascia board, poor attic ventilation, or a section of sagging roof framing may require separate repairs. These findings help set realistic expectations for cost and timing.
The inspection also helps determine whether a full replacement is truly needed. Once the scope is clear, the next step is choosing roofing materials that fit the home and local climate.
Step 2: Choose the Right Roofing Materials
Roofing Materials That Work Well in Wet Climates
Roofing materials should be selected for the home’s design, roof slope, and exposure to rain and wind. In a wet climate, the surface material matters, but it is only one part of the roof system. Moisture protection also depends on correct underlayment installation, flashing replacement, edge protection, and ventilation.
Asphalt shingles are common on many sloped homes because they suit a wide range of roof shapes and budgets. Other materials may be appropriate depending on the building and its roof design. Flat or low-slope roofs need materials and drainage details designed for standing water and slower runoff.
For any roofing material, proper installation is essential. A durable surface layer cannot make up for poor flashing, weak deck conditions, or missing moisture barriers.
Factors That Affect Material Choice
Material decisions often depend on practical needs, including:
- Roof slope and complexity
- Home style and neighborhood requirements
- Budget and expected maintenance needs
- Wind and rain exposure
- Existing roof structure and deck condition
- Long-term ownership plans
Property managers and real estate investors may also consider repair frequency, tenant disruption, and the expected service life of the selected system. Homeowners may place greater value on appearance, curb appeal, or matching an existing architectural style.
Why the Right Material Supports the Whole Roof System
A new roof is a connected system. Shingles or other surface materials shed most rain, while underlayment provides a secondary layer of protection. Flashing manages water around openings, and ventilation helps reduce moisture buildup in the attic.
Choosing materials with the entire system in mind helps prepare the project for the next planning stage, including permits, insurance questions, and scheduling.
Step 3: Plan Permits, Insurance, and Scheduling
Do You Need a Permit for Roof Replacement?
Permit requirements vary by city, county, project scope, and building type. A straightforward replacement may have different requirements than a project involving structural repairs, major ventilation changes, or extensive deck replacement. Property owners should ask the contractor how local rules apply to their project.
Permits help ensure work meets applicable building requirements. They can also be important for property records, future sales, and insurance documentation.
How Insurance May Fit Into the Process
Storm damage, fallen branches, wind damage, or sudden leaks may lead a homeowner to contact their insurance carrier. Inspection notes, photos, and records of the damage can help document the condition of the roof.
Insurance coverage depends on the policy, cause of damage, deductible, and adjuster review. Routine aging, wear, and moss-related deterioration may be handled differently than a sudden storm event. It is helpful to understand the roof condition before making decisions about a claim.
Why Timing Matters in the Rainy Season
Roofing crews monitor weather closely during tear-off and installation. Rain can delay work, particularly when the old roof is being removed or the deck is exposed. A professional plan includes protecting the structure when weather changes.
Scheduling during a drier weather window can reduce interruptions, but Pacific Northwest weather can still shift quickly. Homeowners should allow some flexibility for safety and proper installation. For more local planning guidance, review these roof replacement steps for Puget Sound homeowners.
Step 4: Prepare the Home and Property
How to Protect Your Home Before Work Begins
Roof work is noisy and can create vibration, dust, and falling debris around the work area. Before the crew arrives, move vehicles away from the driveway and garage area so materials and debris can be managed safely. Clear patio furniture, grills, potted plants, and fragile outdoor items from around the home.
Inside, remove or secure wall hangings and delicate items that could shift from vibration. Keep pets indoors or arrange for them to stay elsewhere if construction noise will be stressful. Homeowners should also make sure the crew has clear access to gates, electrical outlets if needed, and the areas around the roofline.
What Property Managers and Investors Should Tell Occupants
For occupied rental properties, clear communication is important. Let occupants know the expected start date, work hours, access needs, and areas that should remain clear. They should also understand that roofing work can be loud and that children and pets should stay away from work zones.
Good preparation supports a safer tear-off and helps the crew focus on the physical replacement work.
Step 5: Tear-Off and Remove the Old Roofing
What Happens During Roof Tear-Off
During a roof tear-off, crews remove the old shingles or other roofing surface, underlayment, and often old flashing. Materials are collected and removed from the site. Ground protection may be placed around landscaping, siding, and other vulnerable areas to reduce the chance of damage from falling debris.
Removing old roofing allows the contractor to see the true condition of the structure beneath. This is a key reason a full replacement cannot always be treated as a simple surface installation.
Why Tear-Off Can Reveal Hidden Moisture or Rot
Tear-off often reveals conditions that were covered by the old roof. Moisture may have entered through worn flashing, lifted shingles, failing valleys, or moss-covered areas. The roof deck may show staining, soft wood, rot, or sections that no longer hold fasteners properly.
This is especially common on roofs exposed to long periods of rain and shade. Moss-driven moisture retention can keep a roof surface damp and hide early signs of failure. The deck must be dry and solid before new roofing layers are installed.
How Tear-Off Affects the Final Scope of Work
If damaged decking or structural concerns are discovered, the contractor may need to replace affected materials before continuing. This can change the project scope and add time or cost. While no homeowner wants unexpected repairs, addressing these issues during replacement is safer than covering them with new materials.
Once the old roof is removed and the deck is exposed, the project moves into one of the most important roof replacement stages.
Step 6: Inspect and Repair the Roof Deck
What Roof Deck Inspection Involves
The roof deck is the wood surface attached to the roof framing. It provides the base for underlayment and roofing materials. During inspection, the crew checks for rot, holes, soft areas, sagging, water damage, and loose sections.
The deck should be firm, dry, and able to hold roofing fasteners correctly. Areas around valleys, chimneys, skylights, and past leak locations often receive extra attention because they are more likely to have moisture damage.
Why Roof Deck Repair Cannot Be Skipped
Installing new shingles over damaged decking can lead to uneven surfaces, poor fastening, and future leaks. Weak wood may not support nails properly, and sagging sections can affect how water drains across the roof.
Deck repairs may feel like an added step, but they help create a stable base for the new roof. This is one reason homeowners often see the advantages of roof replacement when aging materials and hidden issues are handled as part of one complete project.
Step 7: Install Drip Edge, Underlayment, and Ice and Water Shield
What Drip Edge Does
Drip edge is a metal strip installed along roof edges. It helps guide water away from the deck and fascia, which is the board along the roofline. It also helps keep water from curling back beneath the roofing materials at the edge.
Proper edge detailing matters because roof edges are exposed to steady rain, wind, and runoff. Without it, water can affect wood trim, gutters, and the lower edge of the roof deck.
Why Underlayment Is an Important Backup Layer
Underlayment is a protective layer installed between the roof deck and the shingles or other surface material. It acts as a backup barrier if wind-driven rain gets beneath the outer roofing layer or if shingles are damaged.
Underlayment does not replace good shingles or flashing, but it adds important protection. In the Pacific Northwest, where roofs may stay damp for long periods, careful underlayment installation helps manage moisture risk.
Where Ice and Water Shield Is Especially Helpful
Ice and water shield is a self-adhering waterproof membrane used in vulnerable roof areas. It is commonly installed along eaves, in valleys, and around penetrations where water can collect or move slowly.
Although the region does not always face the same snow and ice conditions as colder climates, this material can still be valuable in wet areas. Valleys and low roof edges receive heavy runoff, making added protection useful during persistent rain.
Step 8: Install Flashing, Valleys, and Roof Penetration Protection
Where Flashing Is Most Important
Flashing is a thin metal material that directs water away from places where the roof meets another surface or has an opening. It is especially important around chimneys, sidewalls, vent pipes, skylights, dormers, and valleys.
Valleys are the channels where two roof slopes meet. Because they carry concentrated runoff, they need careful installation and durable water-management details.
How Good Flashing Helps Prevent Leaks
A roof leak often begins at a transition point rather than in the center of a shingle field. Flashing overlaps roofing layers in a way that guides water down and away from openings. Step flashing, for example, is used where a roof meets a wall, helping direct water outward instead of behind siding.
Old flashing should be evaluated carefully during replacement. Reusing damaged or poorly installed flashing can weaken an otherwise new roof system.
Why Small Detail Work Matters
Flashing and penetration protection may not be as visible as new shingles, but they are central to long-term water control. Careful work around these details helps every layer perform as intended before shingle installation is completed.
Step 9: Complete Shingle Installation and Fastening
What Happens During Shingle Installation
Shingle installation starts at the lower edge of the roof and progresses upward in overlapping rows. This layout sheds water downward, using gravity to move rain toward gutters and away from the deck.
Crews follow the selected roofing system’s installation requirements for alignment, overlap, and fastening. Shingles are cut and fitted around vents, walls, valleys, and other roof features.
Why Fastening and Layout Matter
Correct fastening helps shingles resist wind uplift and movement during storms. Nails must be placed in the proper area and driven correctly. Overdriven nails can damage the shingle, while poorly placed nails may not hold it securely.
Straight layout also matters. Misaligned rows can affect appearance and may create areas where water does not shed as intended. For a closer look at installation planning, see this complete guide to new roof installation in Bellevue.
Step 10: Finish With Ridge Cap and Ventilation Work
What Ridge Cap Installation Does
Ridge cap installation finishes the peak where two roof slopes meet. Ridge caps cover this exposed area and create a clean transition across the roofline. They also help protect a location that receives direct weather exposure.
Why Roof Ventilation Matters
Roof ventilation helps move heat and moisture out of the attic. Proper airflow can reduce condensation that may dampen insulation or roof framing. In wet climates, ventilation is especially important because indoor moisture and outdoor humidity can contribute to attic moisture problems.
Ventilation design depends on the home’s attic layout, intake vents, exhaust vents, and existing conditions. Once the roof system is complete, the crew can focus on the final jobsite cleanup.
Step 11: Cleanup, Nail Sweep, and Debris Removal
What Post-Installation Cleanup Should Include
Post-installation cleanup includes hauling away old roofing materials, removing protective coverings, and clearing debris from the property. Crews should also check driveways, walkways, landscaping areas, and work zones for stray nails.
A magnetic nail sweep is commonly used to collect metal fasteners that may have fallen during tear-off or installation. Gutters and surrounding areas should also be checked for loose material.
Why Cleanup Matters for Safety and Peace of Mind
A clean site helps protect people, pets, vehicles, and tires. It also gives homeowners a better view of the completed work without leftover debris around the property. The final quality inspection follows cleanup.
Step 12: Final Quality Inspection and Walkthrough
What a Final Roof Inspection Should Confirm
A final inspection reviews visible workmanship and confirms that key roofing details have been completed. This can include shingle layout, ridge caps, flashing, vents, valleys, roof edges, and cleanup.
The contractor should walk through the finished project with the homeowner and explain any maintenance needs or project-specific details. Homeowners should receive information about the installed materials and applicable warranty coverage.
Questions to Ask During the Walkthrough
Useful questions include:
- What maintenance should I plan for each year?
- How should I manage moss growth safely?
- What warranty information should I keep?
- Were any deck repairs or additional fixes completed?
- What signs should prompt a future roof inspection?
This walkthrough gives property owners a chance to understand their new roof and plan for its care.
How Long Does a Roof Replacement Take?
Common Factors That Change the Schedule
How long does a roof replacement take? The answer depends on roof size, complexity, material type, weather, permit timing, crew access, and conditions found during tear-off. A simple roof may move quickly, while a roof with multiple levels, skylights, steep slopes, or deck repairs can take longer.
Rain is another major factor in the Pacific Northwest. Crews may pause work during unsafe weather or when conditions could expose the home to moisture. Material availability can also affect the start date or project sequence.
A contractor can provide an estimated timeline, but it is important to understand that roof replacement involves conditions that cannot always be confirmed until the old roof is removed.
What Homeowners Can Do to Stay Prepared
Stay in contact with the contractor, watch for scheduling updates, and keep access areas clear. If weather or hidden deck damage changes the plan, ask how it affects the remaining work. Flexibility helps the project move forward without rushing important details.
How to Know If You Need a Full Replacement or a Repair
Signs a Full Replacement May Be the Better Choice
A full replacement may be the better option when leaks keep returning, shingles are widely worn, flashing has failed in several areas, or the deck has moisture damage. Roofs near the end of their expected service life may not benefit from repeated patches, particularly if the same issues appear in different locations.
Moss growth, trapped moisture, and aging underlayment can also point to broader roofing concerns. A complete project allows the deck, underlayment, flashing, and ventilation to be reviewed together.
When a Repair May Still Make Sense
A repair can make sense when damage is limited to one small area and the rest of the roof remains in good condition. For example, a single damaged vent flashing or a few shingles affected by a branch may not require full replacement.
A professional inspection helps distinguish a localized issue from a system-wide problem. Homeowners considering their options can also review this comprehensive guide to roof replacement in Bellevue.
Final Thoughts: Plan Your Roof Replacement With Confidence
Key Takeaways to Remember
The roof replacement process begins with inspection and planning, not just installation day. Tear-off may uncover moisture damage or deck rot that was hidden by old roofing, especially on homes exposed to long wet seasons and moss growth.
A complete system includes a solid roof deck, quality underlayment, drip edge, ice and water shield where needed, careful flashing, correct shingle installation, ridge caps, and balanced ventilation. Cleanup and a final walkthrough are also important parts of the job.
Next Step for Homeowners
If you are planning a replacement, start with a clear inspection and discussion of your home’s needs. Roof Pros NW can help homeowners understand the roof replacement steps, material options, and site conditions involved in a well-planned project. To discuss your roof and schedule an evaluation, use the booking page.
Conclusion
A roof replacement is a full project with several important steps, and each one affects the final result. It starts with a careful inspection, then moves into material selection, scheduling, tear-off, deck repair, waterproofing layers, flashing, shingle installation, ventilation, cleanup, and a final walkthrough. When homeowners understand this process, it is easier to see why a replacement takes time and why each detail matters.
For homes in the Pacific Northwest, the condition of the roof deck, flashing, and underlayment is especially important. Heavy rain, wind, moss growth, and long wet seasons can hide damage until old roofing is removed. That is why a roof can look fine from the ground but still need repairs once the tear-off begins. Hidden rot, soft wood, worn flashing, and moisture damage are common reasons a replacement becomes more than just a surface update.
This is also why the right roofing system matters. A good roof is not just shingles. It is a connected system that includes proper edge protection, underlayment, flashing, ventilation, and a solid deck underneath. If one part is weak, the whole roof can be affected. Choosing materials that fit the home, roof slope, budget, and weather exposure helps support long-term performance and makes the rest of the project go more smoothly.
Planning also plays a big role. Permits, insurance questions, and weather timing can all affect the schedule. Property owners should be ready for possible rain delays, especially during the wetter months. Clear preparation before work begins also helps protect the home, landscaping, vehicles, and indoor items from dust, noise, and falling debris. For occupied homes or rentals, good communication with tenants or occupants is just as important.
The final stages matter too. A proper cleanup, nail sweep, and walkthrough help confirm that the work was completed well and that the property is safe after the crew leaves. Homeowners should leave the project with a clear understanding of the materials used, the condition of the roof deck, and any warranty details or future maintenance needs.
If you are trying to decide whether your roof needs repair or replacement, the best next step is a full inspection. That is the only way to see the true condition of the system and make a clear decision based on facts, not guesswork. If you want more local guidance, review the roof replacement steps for Puget Sound homeowners or explore the comprehensive guide to roof replacement in Bellevue.
When you are ready to move forward, Roof Pros NW can help you understand your options and plan the next step with confidence. To get started, you can also use the booking page to schedule an evaluation.
Knowing the roof replacement steps ahead of time can help you feel prepared, avoid surprises, and make better choices for your home. This guide covers the full process from inspection to cleanup, with special attention to the planning details that matter most for Pacific Northwest homes, where rain, moss, and hidden moisture can change the scope of the job.
- Start with a full inspection before work begins: A roof replacement should begin with checking the roof surface, attic, flashing, and roof deck so the contractor can spot damage, leaks, and soft spots before tear-off starts.
- Choose roofing materials based on local weather: In the Pacific Northwest, durable materials, strong underlayment, and proper moisture protection matter because long wet seasons can wear down a roof faster.
- Plan for permits, insurance, and scheduling early: Roof replacement often involves permits and sometimes insurance claims, and timing the project around the rainy season can help reduce delays and weather-related issues.
- Expect tear-off to reveal hidden deck damage: Older roofs with moss growth and trapped moisture may hide deck rot, so homeowners should be ready for possible repairs that may not be visible until the old roof is removed.
- Roof deck repair is a key step, not an extra: If damaged decking is found, it must be fixed before new roofing goes on, since a solid roof deck is needed for proper support and long-term performance.
- Underlayment and ice and water shield protect against moisture: These layers help block water intrusion, and ice and water shield is especially important in wetter climates like Puget Sound where rain exposure is constant.
- Flashing, drip edge, and ventilation help the whole system work: Good roof replacement includes careful installation around chimneys, valleys, and vents so water moves off the roof correctly and the attic stays healthier.
- Cleanup and final inspection are part of the job: A quality roof replacement should end with a nail sweep, debris removal, and a final walkthrough to confirm the roof was installed properly.
With these key points in mind, the rest of the article will walk you through each roof replacement step in more detail so you know what to expect and how to plan with confidence.
Plan Your Roof Replacement With Confidence
A roof replacement is a major investment, but the right plan can make the process clear and manageable. If your roof is aging, showing wear, or no longer protecting your home as it should, now is a good time to discuss your options with a trusted local team.
Roof Pros NW can help you understand the condition of your current roof and build a replacement plan that fits your home, goals, and budget.
- Get a clear review of your roof’s current condition
- Compare material options that fit Puget Sound weather
- Understand the expected scope, timeline, and next steps
- Receive straightforward answers to your replacement questions
- Plan ahead before minor wear becomes a larger project
A professional consultation can help you make decisions on your schedule, without guessing about what your home needs. Take the next step toward a durable, dependable new roof by booking your roof replacement consultation.
How much does a roof replacement cost?
Roof replacement pricing depends on roof size, pitch, material choice, tear-off work, deck repairs, flashing replacement, ventilation needs, and how easy the roof is to access. A roof with hidden damage or storm wear can cost more because the crew may need to repair the structure before new materials go on. The best way to get a clear price is to schedule an inspection and estimate with Roof Pros NW.
How do I know if I need roof repair or roof replacement?
A repair may be enough if the damage is small and limited to one area. A full replacement is often the better choice when the roof has repeated leaks, widespread wear, missing or curling shingles, soft decking, failed flashing, or age that puts the whole system near the end of its life. A professional inspection can show whether the problem is isolated or part of a larger roofing issue. Roof Pros NW can inspect the roof and explain which option makes the most sense.
How long does a roof replacement take?
The timeline depends on roof size, roof slope, material type, weather, permit needs, and what the crew finds after tear-off. Hidden deck damage or wet weather can add time because the roof must be repaired and kept dry before the new system is finished. The safest answer is to plan for flexibility and get a project timeline after inspection. Roof Pros NW can review your roof and give you a realistic schedule.
What should I ask before hiring a roofing contractor?
Ask what is included in the estimate, whether the contractor is licensed and insured, what materials they plan to use, how they handle deck repairs, what warranty coverage is offered, and how they protect and clean up the property. It also helps to ask how they communicate schedule changes and weather delays. Clear answers show whether the contractor is organized and trustworthy. Roof Pros NW welcomes those questions and can walk you through the process.
What does a roof replacement estimate usually include?
A good estimate should explain the scope of work, roofing materials, tear-off, underlayment, drip edge, flashing work, ventilation details, cleanup, and any expected deck repairs. It should also note assumptions about access, permit needs, and weather related delays. If anything is unclear, ask for a line by line explanation so you know what is covered before work starts. Roof Pros NW can provide an estimate and explain each part of the project.
