Roof Replacement Steps: How to Prepare Your Home
A successful roof replacement begins long before the first old shingle is removed. The work on your roof may take only a few days, but the preparation you do beforehand can help protect your belongings, reduce stress, and keep the project on track. From clearing the driveway to checking attic storage, small details can make a major difference once the crew arrives. Understanding the right roof replacement steps also helps you ask better questions, plan for the unexpected, and feel more confident about the work being done on your home.
For Pacific Northwest homeowners, preparation matters even more. Long wet seasons, sudden rain, wind, moss, and steady moisture can affect scheduling and expose weak points in an aging roof. Once the old roofing materials come off, the roofing contractor may find issues that were not visible from the ground, such as worn flashing, soft areas of roof deck, or moisture damage beneath the shingles. Starting with a professional roof inspection gives you a clearer picture of your roof’s condition and helps establish a realistic scope, timeline, and budget before work begins.
Knowing how to prepare for a roof replacement is about more than making space for ladders and materials. It means confirming whether a roofing permit is needed, choosing materials that fit your home and local climate, and setting aside room in the budget for hidden repairs. It also means protecting the areas around your home. Vehicles should be moved away from the work zone, patio furniture and grills should be relocated, and fragile attic items should be covered or moved. Tear-off can create vibration and dust inside the home, while falling debris and foot traffic can affect landscaping and outdoor spaces.
A clear plan also makes daily life easier during the roof replacement process. Families may need to plan around noise, keep pets safely indoors or away from the property, and make sure the crew can access the roof, driveway, and electrical outlets if needed. Property managers and owners of rental homes should also communicate timing and access expectations early, especially when tenants will be present during construction.
The goal is not to predict every detail. It is to prepare for the steps before roof replacement begins so there are fewer surprises along the way. In this guide, you will learn what to do before the crew arrives, what happens during tear-off and installation, how weather can affect the roof replacement timeline, and how to protect your home, property, and peace of mind throughout the project.
Introduction: Why Roof Replacement Preparation Matters
A roof replacement starts well before the first shingle comes off. The planning and preparation stage helps protect your home, belongings, and property while giving the roofing crew a clear, safe place to work. For homeowners, property managers, and real estate investors, knowing how to prepare for a roof replacement can make the entire project feel more organized.
The main roof replacement steps include an inspection, material selection, permit planning, home preparation, tear-off, deck repairs if needed, installation, cleanup, and a final review. Some of these steps happen before the crew arrives, and they deserve just as much attention as the installation itself.
Preparation matters even more in the Pacific Northwest. Long wet seasons, wind, moss growth, and moisture can affect roof conditions and scheduling. Old roofing materials may hide water damage, weak areas in the roof deck, or worn flashing that cannot be fully seen from the ground. Planning for these possibilities helps reduce stress if the project scope changes after tear-off.
What Homeowners Should Expect Before the First Shingle Comes Off
Before installation day, a roofing contractor should inspect the roof, explain the scope of work, discuss materials, and coordinate access to the property. You will also need to prepare indoor and outdoor spaces for noise, vibration, falling debris, and crew traffic.
These steps before roof replacement help homeowners and managers avoid last-minute decisions. They also give tenants, family members, and neighbors time to plan around the work.
Why Preparation Matters in the Pacific Northwest
Rain and moisture can slow certain parts of the roof replacement process. A contractor may need to adjust the schedule when weather conditions are unsafe or when exposed roofing areas need protection.
Moss can also hold moisture against roofing materials, while wind can damage shingles, ridge areas, and flashing. Once old materials are removed, hidden issues may become visible. A careful plan allows room for repairs without turning a normal project update into a surprise.
Start With a Roof Inspection and Clear Plan
A professional roof inspection is one of the most important roof replacement steps. It gives you a clearer picture of the roof’s condition before you commit to materials, scheduling, and budget decisions. A visual look from the ground is helpful, but it cannot always reveal the full condition of the roof system.
Scheduling reliable local roof inspections before replacement helps identify known concerns early. The inspection findings can shape the work plan, including whether the project needs new flashing, ventilation improvements, deck repairs, or other related work.
What a Roof Inspection Can Reveal Before Replacement
An inspection may identify issues that are not obvious from the driveway or sidewalk, including:
- Signs of hidden roof leaks or moisture entry
- Soft or weakened areas in the roof deck
- Damaged flashing near chimneys, vents, skylights, and valleys
- Poor attic ventilation that can affect roof performance
- Moss buildup and moisture-related wear
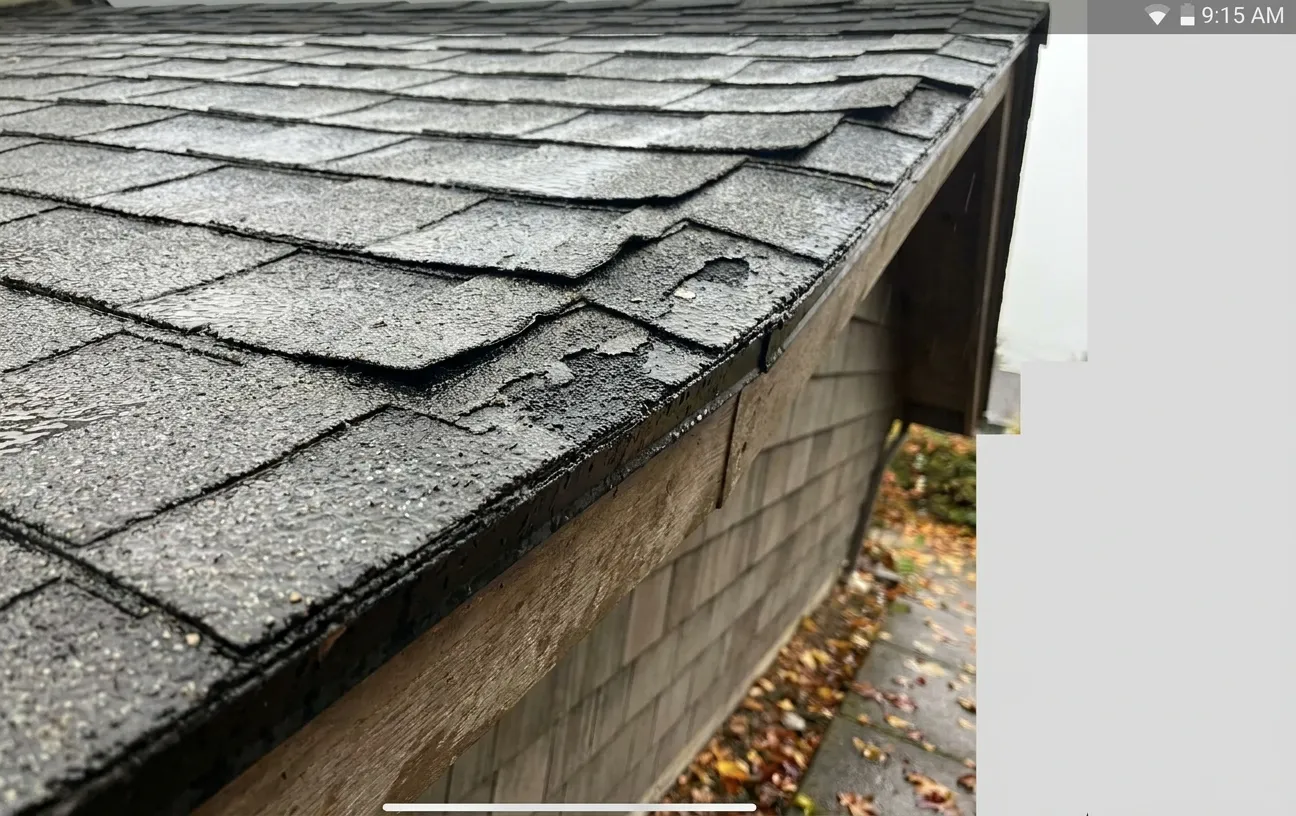
- Curling, missing, cracked, or aging roofing materials
The roof deck is the wood surface beneath shingles and underlayment. It needs to be solid before new roofing materials are installed. If moisture has caused decay or soft spots, those areas may need attention during the project.
How an Inspection Helps Set the Scope of Work
The inspection helps determine whether the project is a standard replacement or whether it includes additional repairs. A clear scope should explain what will happen during tear-off, what underlayment will be installed, and whether flashing or decking work may be needed.
This does not mean every possible issue can be known before old materials come off. However, a thorough inspection helps you understand the likely condition of the roof and plan for reasonable contingencies.
Questions to Ask Before the Work Begins
Ask your roofing contractor clear questions before the start date:
- What parts of the roof will be replaced?
- Are there visible signs of roof deck damage?
- Which materials are planned, including underlayment and flashing?
- What is the expected roof replacement timeline?
- What happens if hidden issues are found during tear-off?
- How will the crew protect the home if weather changes?
Clear answers help you compare the work plan with your expectations before materials arrive.
Understand the Full Roof Replacement Process
Understanding the roof replacement process helps you know what to expect on installation day. While each roof is different, most projects follow a similar order from planning through cleanup. For a closer look at the general sequence, review Roof replacement steps for Puget Sound homeowners.
Step 1: Set the Project Scope and Material Choice
The project begins with selecting materials that fit the home, roof structure, budget, and local climate. Asphalt shingles are a common option, but the right choice depends on roof slope, design, maintenance expectations, and weather exposure.
Material selection should consider how the roof handles rain, wind, moss, and moisture. It should also match the home’s style and existing roof details, such as skylights, chimneys, vents, and valleys.
Step 2: Tear-Off of Old Roofing Materials
Tear-off means removing the old shingles and the materials beneath them as needed. This stage can be noisy and may create vibration inside the home. It is also when debris is most likely to fall around the property, which is why outside preparation matters.
Removing old layers gives the crew access to the roof deck. It allows them to see whether the surface beneath the old roof is solid and ready for installation.
Step 3: Roof Deck Check and Repairs
After tear-off, the crew checks the roof deck for soft spots, water damage, decay, or other concerns. A sound deck provides the base for the new roof system.
If damaged sections are found, repairs may be needed before underlayment and shingles go on. This is one reason it is wise to plan some flexibility into your budget and schedule.
Step 4: Underlayment, Flashing, and Roofing Layers
Underlayment is a protective layer installed over the roof deck and below the visible roofing material. It supports the roof’s defense against moisture.
Flashing is installed or replaced around areas where water needs extra guidance, including vents, chimneys, valleys, roof edges, and wall connections. The crew may also review ventilation components, since proper attic airflow can help manage heat and moisture.
Step 5: Final Installation and Cleanup
Once the roof layers and flashing are in place, the crew completes the installation details and cleans the work area. Cleanup often includes collecting larger debris and using a magnet sweep to look for loose nails around driveways and paths.
A final review gives you the opportunity to ask questions about the completed work, maintenance, and warranty documents.
Prepare the Inside of Your Home Before Work Starts
Indoor preparation is an often-overlooked part of a roof replacement preparation checklist for homeowners. Tear-off and installation can create vibration, noise, and some dust, especially in attic spaces.
Clear the Attic and Protect Stored Items
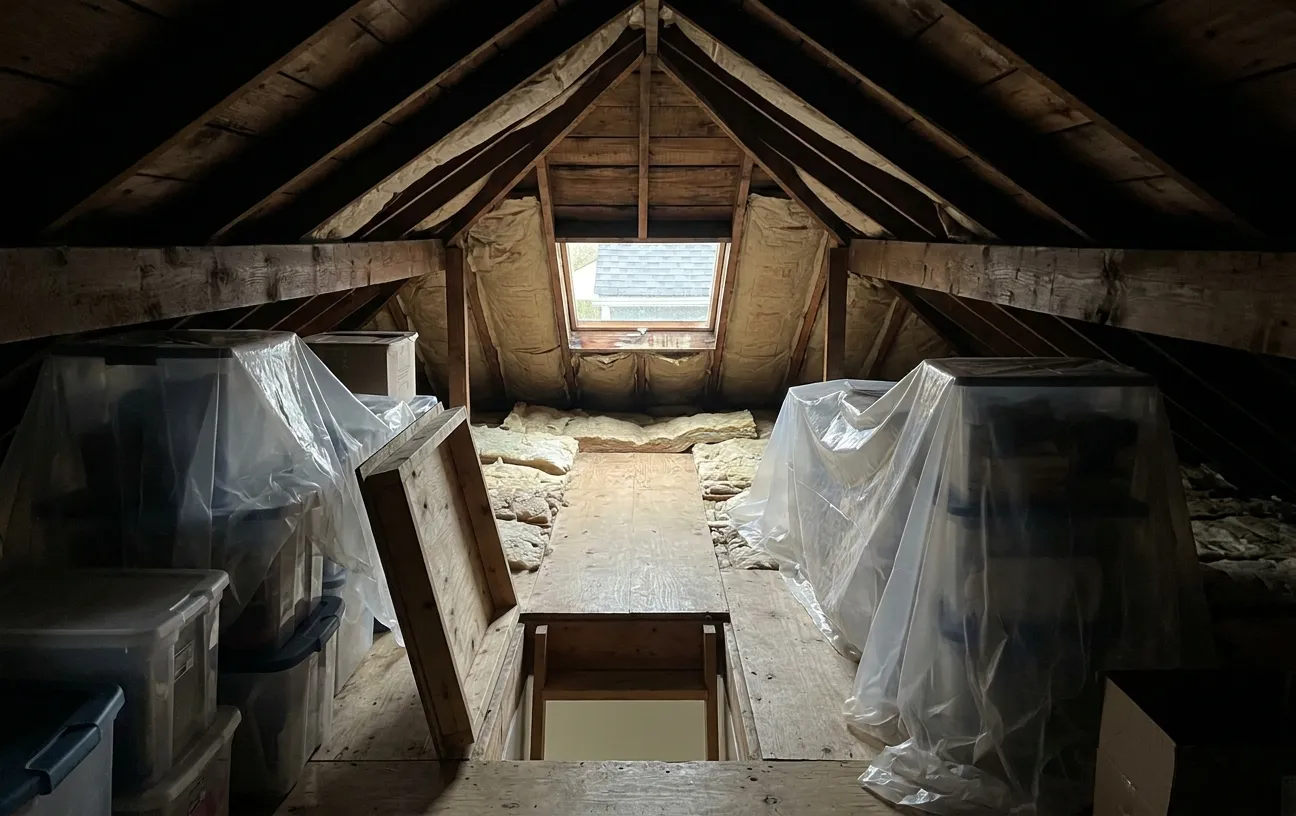
If you use the attic for storage, move valuable, fragile, or sensitive items away from the work area before the crew arrives. Boxes, seasonal decorations, furniture, and stored belongings can collect dust during roof work.
If items must remain in the attic, cover them with sheets or protective coverings. This simple step can make post-project cleanup easier and protect belongings from dust or small particles.
Protect Walls, Ceilings, and Belongings Inside the Home
Vibration from roofing work can affect loose wall items. Remove fragile pictures, mirrors, shelves, or decor that could shift or fall. It may also help to cover electronics or furniture directly below attic access points if dust is a concern.
Check ceilings before work begins and note any existing stains or cracks. This gives you a useful point of reference if you have questions later.
Plan for Noise and Daily Disruption
Roof replacement is loud, especially during tear-off. Plan around work calls, online meetings, naps, school schedules, and quiet time. Pets may also be stressed by unfamiliar sounds.
You do not always need to leave the home, but many people find it more comfortable to spend part of the day elsewhere. Discuss expected work hours with your contractor so you can plan ahead.
Prepare the Outside of Your Home and Property
Preparing the exterior creates a safer work zone and helps protect your property. It also gives the crew room for materials, equipment, debris removal, and ladder access.
Move Vehicles and Keep the Driveway Clear
Park vehicles away from the home and away from the driveway if the contractor requests it. Crews may need space for a dumpster, material delivery, trailers, or equipment.
Moving vehicles also reduces the chance of dust or debris landing on them. Choose a parking location that will not block crew access or emergency routes.
Protect Landscaping, Plants, and Outdoor Features
Move patio furniture, grills, decorations, toys, planters, and other loose items away from the house. Cover delicate plants when appropriate, but avoid placing coverings that could crush or trap moisture around them for too long.
Falling debris and foot traffic may affect landscaping near the roofline. Point out irrigation lines, fragile features, garden beds, or outdoor structures to the contractor before work starts.
Secure Pets and Limit Access to the Work Zone
Keep pets indoors, at another location, or in a secure area away from the work zone. Open gates, loud noise, unfamiliar workers, and debris can create stress and safety concerns for animals.
Property managers should also communicate clearly with tenants about restricted areas, parking changes, and expected noise.
Make Space for Crew Access
Keep paths to the roof, driveway, electrical outlets, and staging areas clear. Trim access obstacles only if discussed with the contractor. Simple access helps the crew focus on the roof rather than navigating around stored items or blocked walkways.
Check Permits, Rules, and Project Details Early
A common question is, “Do I need a permit before replacing my roof?” The answer depends on the location, the scope of work, and local building requirements. Confirm permit needs early so they do not delay the project.
For local planning details, Understanding Bellevue roofing regulations for a new roof can help homeowners understand why early coordination matters.
Do You Need a Roofing Permit?
Some roof replacement projects require a roofing permit, while others may have different requirements based on the work involved. Structural repairs, major changes, or certain local rules can affect the permit process.
Ask who will handle permit coordination and what information you need to provide. Getting this answer before scheduling avoids confusion later.
Why Local Rules Matter for Roof Replacement
Local rules can address safety, materials, inspection requirements, or project timing. Homeowner associations may also have guidelines about roofing colors or material types.
The goal is not to make the process complicated. It is to confirm requirements early enough that material orders and installation dates can stay organized.
What Property Managers and Owners Should Confirm
For rental homes and managed properties, confirm:
- Tenant communication and notice timing
- Approved work hours
- Parking and access needs
- Material staging locations
- Who will answer questions during the project
Budget for the Roof and Possible Extra Costs
When considering how to budget for a roof replacement and unexpected costs, look beyond the base estimate. The initial proposal should outline known work, but hidden damage may only appear after tear-off exposes the roof deck and flashing areas.
Why Roof Replacement Costs Can Change
Moisture damage, soft decking, worn flashing, or ventilation concerns may not be visible until old materials are removed. This is a normal possibility with older roofs, especially in areas with long wet seasons.
Ask the contractor how additional work will be documented and approved if it is needed. A clear process helps you understand changes before work moves forward.
How to Plan for Unexpected Repairs
Set aside some room in the budget for possible repairs. You do not need to assume the worst, but it is practical to prepare for work that cannot be confirmed until the roof is opened.
If financing is part of your planning, explore smart roof financing solutions before the project begins rather than waiting for a decision during construction.
Choosing Between Immediate Repairs and Long-Term Value
Repeated patching may make sense for a limited issue, but an aging roof with widespread wear may need a more complete solution. Ask how each option affects the roof’s condition, maintenance needs, and future repair risk.
A good decision considers current cost as well as the value of addressing known concerns while the roof is already being replaced.
Choose Roofing Materials That Fit Your Home and Climate
Material selection affects appearance, maintenance, and how the roof handles local weather. The best option is not always the same for every home.
Match the Material to the Roof Structure and Home Style
Roof slope, structural support, design details, and curb appeal all matter. Some materials work better on certain roof shapes than others. Your contractor can explain which options fit the structure and the look you want.
Think About the Pacific Northwest Climate
In the Pacific Northwest, roofing materials should be selected with rain, moisture, wind, and moss in mind. Good drainage details, properly installed flashing, and suitable underlayment are just as important as the visible roofing surface.
For more planning around local conditions, consider weather challenges to consider before getting a new roof in Bellevue.
Ask About Lifespan, Maintenance, and Warranty
Ask how the material should be maintained, how moss should be addressed, and what warranty documents you should keep. Understanding basic care needs can help you protect your investment after installation.
Plan Around Weather and the Roof Replacement Timeline
Weather is an important part of what to do before a roof replacement begins. Rain can affect tear-off, exposed deck work, and installation timing. Contractors watch conditions closely and may adjust the schedule to protect the home and crew.
Why Timing Matters in Wet Weather
During long wet seasons, a dry window may be needed for certain stages of the work. Wind can also affect safe ladder use and material handling. Schedule flexibility is helpful, especially when rain is common.
What a Weather Backup Plan Can Look Like
Ask your contractor how weather updates will be shared and what happens if rain arrives unexpectedly. A weather plan may include shifting the start date, changing the daily work sequence, or protecting work areas until conditions improve.
Stay available by phone near the project date so schedule changes can be communicated quickly.
How Long a Roof Replacement May Take
The roof replacement timeline depends on roof size, complexity, weather, material type, and repairs found during tear-off. A simple roof may move faster than a roof with steep slopes, multiple valleys, skylights, or deck repairs.
Your contractor should provide an estimated timeline while explaining that conditions can change.
Work Closely With Your Roofing Contractor
Good communication supports every part of the roof replacement process. Before work begins, make sure everyone understands the schedule, access plan, cleanup expectations, and contact process.
What to Confirm Before the Crew Arrives
Confirm these details in advance:
- Start date and estimated timeline
- Your primary contact for questions
- Material, equipment, and dumpster placement
- Parking and access arrangements
- Cleanup plan and final walkthrough process
Also provide information about gates, pets, tenant schedules, or property features that could affect the work.
How to Stay Informed During the Project
If the project lasts more than one day, regular check-ins can help you stay informed about progress, weather delays, or repair findings. You do not need to supervise the crew constantly, but staying reachable helps decisions move forward when needed.
Questions to Ask About Work Quality and Warranty
Before the project ends, ask what happens after installation, whether there will be a final walkthrough, and which warranty details should be saved. Keep copies of your contract, material information, permit records if applicable, and final project documents.
Roof Replacement Checklist: What to Do Before the Crew Arrives
Use this roof replacement checklist as a quick reference before installation day.
Home Preparation Checklist
- Schedule a roof inspection
- Confirm the scope of work and planned materials
- Clear attic items or cover stored belongings
- Move valuables and fragile wall decor
- Protect indoor areas where dust may be a concern
- Park vehicles away from the home
Outdoor Preparation Checklist
- Move patio furniture, grills, planters, and decorations
- Secure pets away from the work area
- Clear the driveway and access paths
- Protect delicate landscaping where practical
- Confirm outlet, gate, and access needs with the contractor
Planning Checklist
- Confirm permits and local requirements
- Review roofing material choices
- Discuss weather timing and schedule updates
- Set aside budget room for possible deck or flashing repairs
- Tell tenants, neighbors, or household members about the work schedule
- Save contractor contact information for project-day questions
Final Thoughts: A Good Roof Replacement Starts With Good Preparation
The most useful roof replacement steps happen both before and during installation. Start with a clear inspection, understand the scope, prepare your attic and property, confirm permits, plan for weather, and allow room in the budget for hidden repairs.
Taking these steps helps protect your belongings, supports safe crew access, and makes it easier to handle schedule changes during Pacific Northwest rain. Preparation does not remove every unknown, but it gives you a stronger plan for handling them.
When You Are Ready for the Next Step
If you are considering a new roof, begin by asking questions and scheduling an inspection. You can Get your free roof inspection estimate today with Roof Pros NW to better understand your roof’s condition and next steps.
How Roof Pros NW Can Help
Roof Pros NW can help homeowners, property managers, and property owners understand project scope, timing, material choices, and preparation needs before installation begins. Working with a trusted local roofing contractor makes it easier to approach roof replacement with a clear plan.
Conclusion
A successful roof replacement starts with preparation. When homeowners, property managers, and property owners take time to plan ahead, the project is easier to manage and less stressful from start to finish. The most important steps include a professional inspection, clear material choices, permit checks, interior and exterior prep, and a realistic plan for weather delays or hidden repairs.
In the Pacific Northwest, this kind of planning matters even more. Long wet seasons, wind, moss, and moisture can affect both the roof itself and the schedule for replacing it. A roof that looks fine from the ground may still have hidden problems like soft decking, worn flashing, poor ventilation, or moisture damage. That is why it helps to treat replacement as a full roof system project, not just a shingle change. The deck, underlayment, flashing, vents, and cleanup all play a role in how well the new roof performs.
One of the best ways to stay prepared is to start with a thorough inspection. A roof inspection can reveal damage that is not easy to see on your own and can help define the scope of work before installation begins. It also gives you a better sense of whether the project is a straightforward replacement or one that may include repairs once the old roofing is removed. If you want a clearer picture before moving forward, scheduling reliable local roof inspections is a smart first step.
It also helps to understand the full process before the crew arrives. Once you know what to expect during tear-off, deck checks, flashing work, underlayment installation, and final cleanup, it is easier to prepare your home and property. Simple steps like moving vehicles, protecting attic items, securing pets, and clearing access paths can make a big difference on project day. For a broader look at the sequence, review the roof replacement steps for Puget Sound homeowners.
Just as important, be ready for the parts of the project you cannot fully see ahead of time. Hidden damage may show up after old materials are removed, and weather can affect the timing of the work. Leaving room in the budget and schedule for these possibilities can help you make better decisions without feeling rushed.
If you are planning a new roof, the best next step is to get clear answers before work begins. Roof Pros NW can help you understand your roof’s condition, your replacement options, and what preparation is needed before installation. If you are ready to move forward, get your free roof inspection estimate today with Roof Pros NW and take the first step toward a well-planned roof replacement.
Preparing for a roof replacement is just as important as the work itself. A little planning before the crew arrives can help protect your home, limit disruptions, and keep the project moving smoothly. These key takeaways cover the most important roof replacement steps, from inspection and permits to weather planning and property protection.
- Start with a roof inspection and clear plan: A professional inspection helps confirm what needs to be replaced, spot hidden damage, and set the scope before work begins.
- Prepare for the full roof replacement process: Homeowners should understand the main steps, including tear-off, deck checks, underlayment, flashing, and final installation, so there are fewer surprises.
- Clear the attic and protect indoor items: Move valuables, cover stored items, and remove anything that could be damaged by dust, vibration, or debris during the project.
- Protect landscaping and outdoor property: Take time to move patio furniture, cover plants if needed, and give the crew clear space to work around your home.
- Keep vehicles and pets out of the work zone: Park cars away from the house and secure pets inside or elsewhere to help avoid accidents and stress during tear-off.
- Check permits before the job starts: Some roof replacement projects require permits, so it is important to confirm local rules early and avoid delays.
- Budget for more than just the roof itself: Set aside room for possible extra costs, since hidden deck damage, flashing issues, or other repairs may come up once the old roof is removed.
- Choose materials that fit your home and climate: The right roofing material should match your roof structure, style, budget, and the wet Pacific Northwest climate.
- Plan around rain and changing weather: In the Pacific Northwest, scheduling matters because wet weather can affect timing, tear-off, and project flow, so weather backup plans are smart.
- Work closely with your roofing contractor: Clear communication about timing, access, cleanup, and next steps helps the project run better from start to finish.
With these roof replacement steps in mind, you will be better prepared for what happens before the crew arrives and during the project. The rest of this article will walk you through how to get your home ready, what to expect, and how Roof Pros NW can help make the process easier.
Plan Your Roof Replacement with Confidence
A new roof is a major investment, and the right plan can make the process much easier. Whether you are comparing materials, reviewing costs, or planning around Bellevue weather, a professional assessment gives you clear next steps before you commit.
Roof Pros NW offers a roof replacement consultation and estimate tailored to your home, budget, and timeline. Booking early can help you explore your options and schedule your project at a time that works best for your household.
- Get a clear look at your roof’s current condition
- Compare roofing materials that fit your home and goals
- Receive a detailed estimate with no guesswork
- Learn what to expect during installation
- Ask questions about timing, warranties, and financing options
Take the next step toward a dependable new roof by booking your roof replacement consultation with Roof Pros NW.
How do I know if I need roof repair or roof replacement?
A repair may work if the problem is small and the rest of the roof is still in good shape. A replacement is usually the better choice when the roof is old, leaks keep coming back, shingles are failing in several areas, or there is deck damage, flashing wear, or moisture damage. A roof inspection is the best way to confirm the right path. Roof Pros NW can inspect the roof and help you decide whether repair or replacement makes more sense.
How much should I budget for a roof replacement with hidden repairs?
You should budget for the base roof work plus room for repairs that cannot be seen until the old roof is removed. Hidden costs often come from rotten decking, damaged flashing, moisture issues, or ventilation problems. The final price depends on roof size, roof age, material choice, slope, access, and the amount of repair work needed. Roof Pros NW can inspect the roof and provide an estimate that helps you plan for both the known work and possible surprises.
Do I need a permit before replacing my roof?
Permit rules depend on your location and the type of work being done. Some roof replacements need a roofing permit, while others may not, especially if the job is straightforward. It is best to confirm this early so the project does not get delayed. Roof Pros NW can help you understand what is needed before the work begins.
How do I prepare my home for a roof replacement?
Start by clearing the attic, moving fragile items, and covering anything that must stay stored inside. Outside, move vehicles, patio furniture, grills, and planters away from the work area. Keep pets secure and make sure the crew has clear access to the driveway, roof, and staging areas. These steps help protect your property and make the job move more smoothly.
How long does a roof replacement take?
The timeline depends on roof size, roof shape, weather, material type, and whether hidden damage is found after tear-off. A simple roof may move faster than a roof with steep slopes, valleys, skylights, or needed deck repairs. In the Pacific Northwest, rain can also change the schedule. Roof Pros NW can review your roof and give you a realistic timeline before the project starts.
