Roof Replacement Steps: What to Expect From Start to Finish
A new roof is only as dependable as the layers hidden beneath its shingles. From the street, a roof replacement may look like a simple change in color and material. In reality, the shingles are the final layer of a system designed to move water away from your home, protect the roof structure, and handle years of rain, wind, and changing temperatures. Knowing the roof replacement steps helps you understand what a careful installation should include before the first bundle of shingles reaches your driveway. This matters especially in the Pacific Northwest, where long wet seasons, wind-driven rain, moss, and steady moisture can expose weak points in an aging roof. A roof that is installed over hidden deck damage, missing flashing, or worn underlayment may look finished, but those problems can allow moisture to reach the attic, insulation, ceilings, and walls over time. That is why a professional roof installation involves far more than removing old shingles and putting new ones in their place. The process starts with planning, scheduling, and preparing your property for the work ahead. Once the crew arrives, the roof tear-off makes it possible to inspect the decking underneath. Soft spots, rot, and moisture damage need attention before new roofing materials are installed, because the roof deck provides the stable base that every other layer depends on. From there, each part of the roof installation process has a purpose. Drip edge helps direct water away from the roof edges. Underlayment and an ice and water barrier provide added moisture protection in vulnerable areas. Starter shingles support the first course of shingles, while properly installed flashing helps seal the places where leaks often begin, including chimneys, skylights, vents, walls, and valleys. Attic ventilation should also be reviewed during a replacement. Balanced airflow can help manage heat and moisture in the attic, which supports the performance and lifespan of the roofing system. Just as important, a quality project should end with a detailed final roof inspection, debris removal, and a magnetic nail sweep to help leave the property clean and safe. Understanding these steps can help homeowners, property managers, and property owners ask better questions, recognize the value of a complete installation, and feel more prepared for the project. For a closer look at the process, this guide to roof replacement steps for Puget Sound homeowners walks through what happens from tear-off to final cleanup, why each stage matters, and what to expect from Roof Pros NW during a professional roof replacement.
Understanding the Roof Replacement Steps From Start to Finish
A roof replacement is more than placing new shingles over an old surface. It is a complete system of layers and components that work together to manage water, support the roof structure, and protect the home. The full roof replacement steps often include planning, tear-off, roof deck inspection, repairs, water-resistant layers, flashing, ventilation checks, roofing material installation, and cleanup.
Each stage matters in the Pacific Northwest. Heavy rain, long wet seasons, wind, moss growth, and humid attic conditions can expose weak areas in a roof system. A missing piece of flashing, worn underlayment, or moisture-damaged deck can lead to problems even when the shingles look new.
Why the Roof Replacement Process Matters
The roof replacement process is designed to address the entire roof, not only its visible surface. Shingles shed most rainwater, but underlayment, drip edge, flashing, ventilation, and the roof deck all play important roles.
For example, a roof may have hidden deck damage below old shingles or leaks around a chimney caused by aging flashing. A professional roof installation gives the crew a chance to find and address these issues before the new roof is installed. This helps create a sound base for the roofing materials.
What Homeowners Should Expect Before Work Begins
Homeowners can expect a step-by-step roof replacement that starts with planning and ends with a final roof inspection. The main stages typically include:
- Reviewing the scope, materials, and schedule
- Removing old roofing materials
- Inspecting and repairing the roof deck
- Installing drip edge, underlayment, and water barriers
- Replacing flashing and reviewing ventilation
- Installing starter shingles and the main roofing material
- Completing cleanup and a final walkthrough
Understanding what happens during each stage of roof installation can make the project feel more manageable. The first step is making a clear plan before materials and crews arrive.
Planning, Scheduling, and Preparing for a Roof Replacement
Planning helps the roof installation process move in an organized way. Before installation day, the roofing team should review the roof layout, selected materials, access points, safety needs, and possible areas of concern.
Scheduling the Project and Reviewing the Scope of Work
A clear scope of work explains what will be removed, what new materials will be installed, and how the crew will handle potential deck repairs. It should also cover the expected work schedule and any areas where the crew will need access.
Pacific Northwest weather can affect scheduling. Roofers monitor rain, wind, and moisture conditions because dry working conditions are important when the roof deck and underlayment are exposed. Short weather delays may be necessary to protect the home and allow materials to be installed correctly.
How Homeowners Can Prepare the Property
Simple preparation can make the workday safer and easier for everyone. Before the crew arrives, homeowners can:
- Move vehicles away from the driveway and garage area
- Remove patio furniture, grills, potted plants, and fragile outdoor items
- Clear access to the attic if the crew needs to check ventilation or interior signs of leaks
- Secure pets indoors or arrange for them to be elsewhere during noisy work
- Keep children away from work areas, equipment, and debris containers
Roof replacement involves noise, foot traffic, and falling debris during tear-off. Driveway access may be limited while materials are delivered or removed. Preparing the property helps the crew focus on the roofing work itself.
Permits and Local Requirements
Some roof replacement projects may require permits or must follow local building requirements. These rules can vary based on the property location, roof design, and extent of repairs. A professional roofing crew can help identify applicable requirements and coordinate the needed project details before work begins.
Once planning is complete, the physical roof tear-off can begin.
Roof Tear-Off: Removing Old Roofing Materials
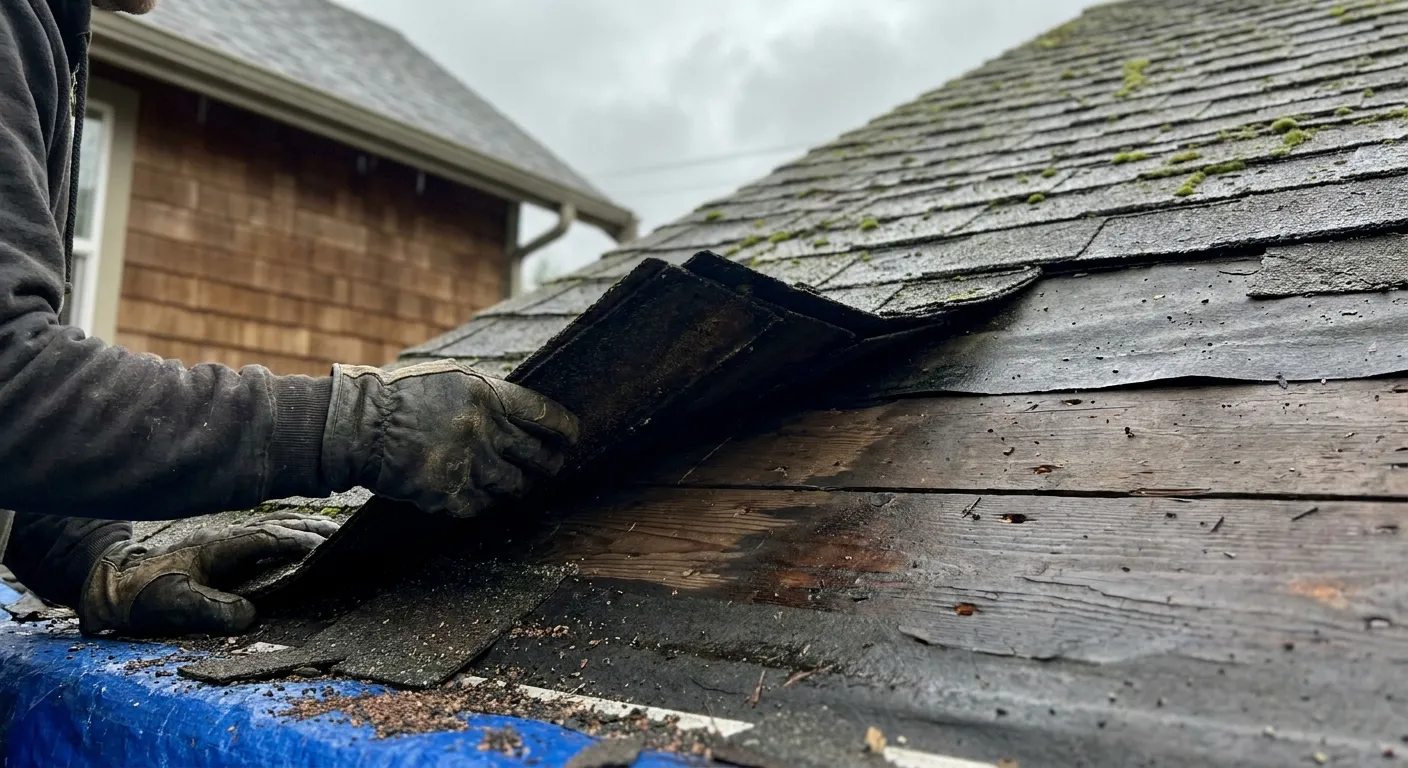
The roof tear-off is a major part of the roof replacement steps. It removes aging materials so the crew can see the condition of the structure beneath them.
Why a Full Tear-Off Is Important
Installing a new roof over hidden problems can leave moisture damage, loose materials, or failing flashing in place. A full tear-off creates a clean surface and allows a proper roof deck inspection. It also helps ensure the new layers can be installed in the correct order.
What Gets Removed During Tear-Off
During tear-off, the crew may remove old shingles, underlayment, loose or exposed fasteners, and worn flashing. Damaged sections of roofing materials are removed down to the deck, which is the wood surface that supports the roof system.
This process can reveal issues that were not visible from the ground, such as water staining, soft wood, or old leaks around vents and valleys.
How Crews Protect the Property During Tear-Off
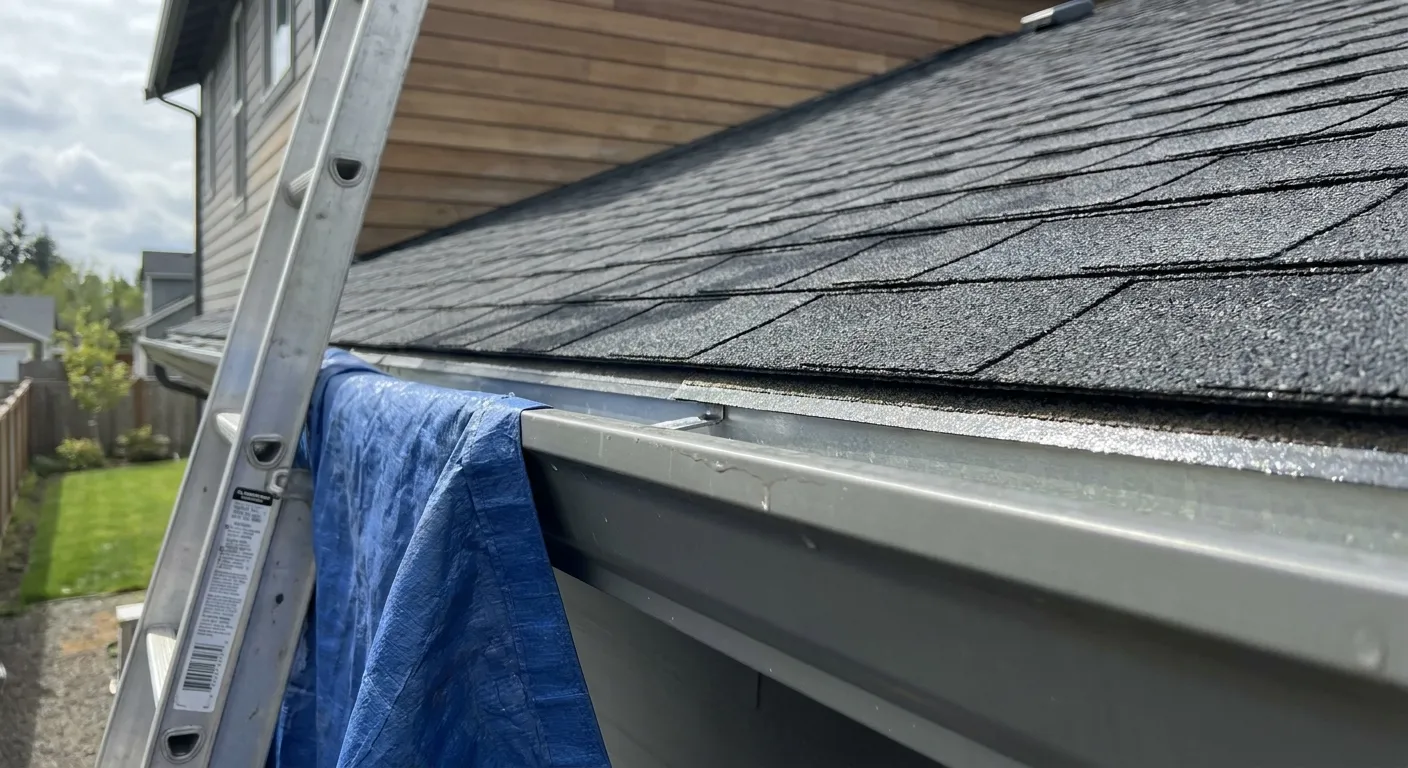
An organized crew uses tarps, designated debris areas, and careful material handling to protect landscaping, siding, windows, and walkways. Debris is collected regularly rather than left scattered around the property.
Property protection does not remove every inconvenience of construction, but it helps keep the jobsite orderly. Once the old roof is removed, the crew can inspect the roof deck closely.
Roof Deck Inspection and Necessary Repairs
The roof deck is the structural base underneath the roof covering. A roof deck inspection is one of the most important new roof installation steps because every other layer depends on it.
What Roof Deck Inspection Reveals
After tear-off, the crew checks the decking for signs of damage or weakness. Common concerns include soft spots, rot, water stains, separated boards, cracked panels, and areas where fasteners no longer hold securely.
The deck should provide a firm, even surface for underlayment and shingles. If it is uneven or damaged, the finished roof may not perform as intended.
Why Roof Decking Repair Must Happen Before New Shingles
Roof decking repair should be completed before new materials are installed. Covering weak or rotted wood can allow damage to continue beneath the new roof. It can also affect shingle alignment and reduce the roof’s ability to resist wind and water.
If repairs are needed, the crew should explain the affected area and the work required. This gives property owners a chance to understand what was found and why repair is necessary.
How Pacific Northwest Weather Can Affect Roof Decking
In the Pacific Northwest, long wet seasons and slow leaks can allow moisture to reach the deck over time. Moss can also hold moisture against the roof surface, while humid attic air may add to moisture concerns from below.
Careful deck inspection is especially important where old leaks, valleys, chimneys, skylights, or roof edges show signs of water exposure. After the base is sound, the crew can add the layers that help direct water away from it.
Drip Edge Installation and Underlayment Installation
Drip edge and underlayment are key water-control layers. They are largely hidden after installation, but they help protect the deck and roof edges when rain gets beneath the outer roofing material.
Drip Edge Installation Along Eaves and Rakes
Drip edge is a metal strip installed along roof edges. Eaves are the lower edges where water runs off, while rakes are the sloped edges at the sides of a gable roof.
Proper drip edge installation helps guide water away from the roof edge, fascia boards, and underlying decking. Replacing it during a roof replacement is often important because old metal may be bent, corroded, or installed in a way that no longer supports good drainage.
Underlayment Installation as a Protective Layer
Underlayment is installed over the roof deck and below the shingles. It acts as a secondary layer of water resistance if wind-driven rain gets past the outer roofing surface.
Underlayment installation also creates a more consistent surface for shingle installation. While it is not a replacement for sound shingles or flashing, it is an important part of the overall roof system.
Ice and Water Barrier in Wet Pacific Northwest Conditions
An ice and water barrier is a self-adhering waterproof layer often used at eaves and other vulnerable areas. Although the Pacific Northwest is known more for rain than severe ice conditions, this barrier can provide extra protection where water tends to collect or back up.
Eaves, valleys, roof-to-wall transitions, and areas around penetrations may need added moisture protection. Heavy seasonal rainfall makes these details especially important for roof replacement steps for Pacific Northwest homeowners.
Flashing Installation Around Roof Weak Points
Flashing installation protects the places where shingles alone cannot create a watertight seal. It is one of the most important details in a professional roof replacement.
What Flashing Does for the Roof
Flashing is typically metal material that directs water away from seams, openings, and changes in the roof shape. It helps seal transitions where water could otherwise move beneath the shingles.
A properly installed flashing system works with the shingles and underlayment to keep water moving down and off the roof.
Common Areas That Need Flashing
Flashing is commonly installed or replaced around:
- Chimneys
- Skylights
- Plumbing vents and other roof penetrations
- Roof-to-wall connections
- Valleys where two roof slopes meet
These locations require careful work because rainwater may collect, flow quickly, or be pushed sideways by wind.
Signs Flashing Problems Can Cause Later
Poor or aging flashing can contribute to ceiling stains, damp attic areas, visible leaks, and moisture damage around walls or chimneys. These symptoms may not appear right away, which is why flashing deserves close attention during the roof replacement process.
After water-control details are in place, the crew should also review the attic airflow that supports the new roof system.
Ventilation Checks During Roof Replacement
Roof ventilation helps manage heat and moisture in the attic. It may not be as visible as shingles, but it can affect roof performance over time.
Why Roof Ventilation Matters
Balanced ventilation allows air to move through the attic. This can help reduce trapped heat and moisture, which may otherwise affect decking, insulation, and shingle conditions.
Ventilation is especially useful in humid climates because warm indoor air can carry moisture into the attic. Without enough airflow, that moisture can condense on cooler surfaces.
Checking and Replacing Vent Components
During replacement, the crew may inspect ridge vents, box vents, intake vents, and vent openings. Worn, blocked, or damaged components may need attention so they work with the new roofing system.
The goal is not simply adding more vents. The intake and exhaust portions need to work together based on the roof design and attic layout.
How Moisture Control Helps in Damp Climates
In the Pacific Northwest, moisture control is an important part of roof care. Proper ventilation can help limit humid attic conditions that contribute to moisture-driven rot and mold concerns. Combined with a dry, repaired deck and strong underlayment, it supports a more durable roof assembly.
With ventilation reviewed, the crew can begin the visible roofing installation.
Starter Shingles and Shingle Installation
Starter shingles and the main shingle installation create the finished outer surface of the roof. The order, overlap, fastening, and alignment all matter.
Why Starter Shingles Come First
Starter shingles are installed at the roof perimeter before the main shingle courses. They provide a solid starting edge and help reduce the chance of wind-driven rain reaching vulnerable areas along the eaves and rakes.
They also help create a clean, consistent line for the first visible course of shingles.
How the Main Roofing Material Is Installed
Shingles or other roofing materials are installed in a planned sequence from the lower roof areas upward. Each course overlaps the one below it so water flows over the surface rather than beneath it.
Correct fastening, alignment, and overlap support a watertight finish. Crews also pay close attention around valleys, vents, walls, and other areas where the roofing pattern must work with flashing.
Choosing Roofing Materials for Long-Term Performance
Roofing material choice can affect appearance, maintenance needs, wind resistance, and expected service life. Homeowners should consider roof slope, home style, local weather, and budget when comparing options. This guide to the best roofing materials for a new roof in Bellevue can help property owners understand common choices.
Once the main material is installed, the project moves into closeout and quality review.
Final Inspection, Cleanup, and Jobsite Closeout
A roof installation is not complete when the last shingle is placed. Final inspection and cleanup are important roof replacement steps that protect the property and confirm the roof is ready for use.
What Happens During the Final Roof Inspection
A final roof inspection typically includes checking shingle alignment, roof edges, flashing, vents, valleys, and the overall finish. The crew looks for visible details that need adjustment before leaving the site.
This review gives the roofing team an opportunity to confirm that the installed components work together as intended.
Cleanup and Debris Removal
Old roofing materials, packaging, and jobsite debris should be removed from the property. Tarps and collection areas help contain debris during the project, followed by a thorough cleanup of driveways, walkways, and surrounding areas.
Why a Magnetic Nail Sweep Matters
Roof tear-off can leave nails hidden in grass, gravel, or driveway cracks. A magnetic nail sweep helps collect these small metal pieces after the work is finished. This practical final step helps make the property safer for residents, pets, and vehicles.
The timing of all these steps can vary based on the property and weather conditions.
How Long a Roof Replacement Takes and What Can Affect the Timeline
How long does a roof replacement take from start to finish? Many residential projects can be completed within a few days, but the exact timeline depends on the roof and conditions found during the work.
Common Factors That Affect Project Length
Several details can affect the schedule:
- Roof size, slope, and number of levels
- The amount of old material being removed
- Roof decking repair needs
- Chimneys, skylights, valleys, and complex roof shapes
- Material type and delivery timing
- Rain, wind, and moisture conditions
Unexpected damage beneath the old roof can add time because repairs need to happen before new materials are installed.
What a Homeowner Can Expect During the Work
Homeowners can expect daytime noise, crew foot traffic, equipment use, and temporary activity around the driveway and yard. A well-run project should remain organized, with the crew communicating about work areas and daily progress.
Knowing what to ask before and during installation can also help property owners follow the project with confidence.
Questions to Ask Before or During a Roof Replacement
Clear questions help homeowners understand what they are paying for and how the crew will handle the details of a step-by-step roof replacement.
Questions About Materials and Installation
- What roofing materials are being installed?
- Will the drip edge, underlayment, flashing, and starter shingles all be replaced?
- Where will an ice and water barrier be used?
- How will ventilation be reviewed as part of the new roof installation?
Questions About Decking and Hidden Damage
- How will the crew handle soft spots or rot in the roof deck?
- What happens if extra repairs are needed after tear-off?
- Will the crew show or explain any damaged decking before repairs begin?
Questions About Final Inspection and Warranty
- Is a final inspection included?
- What does the workmanship or material warranty cover?
- How will cleanup and debris removal be handled?
- Will a magnetic nail sweep be completed before the crew leaves?
For property owners who want to discuss their specific roof layout and materials, they can book a roof consultation with Roof Pros NW.
Roof Replacement Steps for Pacific Northwest Homes
Roof replacement steps for Pacific Northwest homes should account for persistent rain, changing weather, moss, wind, and moisture. A complete roof system is important because water can find small weaknesses in edges, seams, and roof penetrations.
Why Local Weather Makes Each Step More Important
Storm-driven rain can test flashing, valleys, and roof-to-wall transitions. Long damp periods can keep debris and moss wet, increasing the chance that moisture remains on the roof surface. Humid attic conditions may also affect the deck from inside the home.
That is why deck inspection, ice and water barrier placement, underlayment installation, flashing installation, and ventilation checks all deserve careful attention. These are not minor details in a wet climate. They are connected layers of protection.
Why a Complete System Matters More Than a Quick Cover-Up
A roof replacement should protect the structure beneath the shingles, not simply update curb appeal. Addressing worn materials, moisture-damaged decking, drainage edges, flashing, and attic airflow gives the new roof a stronger foundation.
For more local guidance on what to expect during a project, review these roof replacement steps for Puget Sound homeowners.
Conclusion
A roof replacement is not just about putting on new shingles. It is a full process that starts with planning and ends with a finished roof that can better handle rain, wind, and long wet seasons. When each step is done in the right order, the roof system has a stronger chance of performing as it should. That includes tear-off, roof deck inspection, deck repairs, underlayment, drip edge, flashing, ventilation checks, shingle installation, and final cleanup.
For homeowners and property owners in the Pacific Northwest, these details matter even more. Moisture, moss, wind, and heavy rain can expose weak spots that are easy to miss from the ground. A roof may look fine on the outside while hidden damage is still affecting the deck, flashing, or attic space. That is why a complete replacement process focuses on the whole system, not just the surface layer.
One of the biggest takeaways is that a new roof should begin with a sound base. If the roof deck has soft spots, rot, or water damage, those issues need to be fixed before new materials go on. The same is true for flashing around chimneys, skylights, vents, and valleys. These are the spots where leaks often start, so they deserve careful attention during the project. Ventilation also plays an important role because trapped heat and moisture can shorten roof life over time.
The article also shows that a good roof replacement is planned, not rushed. Clear communication about materials, schedule, possible repairs, and weather delays helps the project move forward in a smoother way. It also helps homeowners know what to expect while the crew is working on the property. Cleanup, debris removal, and a magnetic nail sweep are the final steps that help leave the home safer and the job complete.
If you are comparing roof repair and replacement, or if you are not sure what shape your roof is in, the best next step is a professional inspection. A trained roofer can look at the shingles, deck, flashing, ventilation, and other parts of the system to help you understand what needs attention now and what can wait.
If your home is showing signs of aging, leaks, or storm damage, Roof Pros NW can help you review your options and plan the right next step. You can also learn more about roof replacement steps for Puget Sound homeowners or book a roof consultation with Roof Pros NW to get started.
Understanding the roof replacement steps can help you know what to expect before the crew arrives and why each stage matters. A professional roof installation is more than just putting on new shingles. It includes tear-off, deck checks, underlayment, flashing, ventilation, cleanup, and a final inspection to help protect your home for years to come.
- Start with a full tear-off and deck check: A proper roof replacement begins by removing old roofing materials so the roof deck can be inspected for soft spots, moisture damage, or rot before new materials go on.
- Fix roof deck problems before new shingles are installed: Any damaged decking should be repaired first, since hidden rot can weaken the roof and shorten the life of the new system.
- Use drip edge and underlayment the right way: Drip edge helps guide water away from the roof edges, while underlayment adds a needed layer of protection under the shingles.
- Ice and water barrier matters in the Pacific Northwest: Because of heavy rain and long wet seasons, eaves and other key areas need extra moisture protection to help reduce leak risk.
- Flashing protects the weak points on your roof: Chimneys, vents, skylights, and valleys need proper flashing so water does not slip into places where leaks often start.
- Ventilation should be checked during installation: Good attic ventilation helps control heat and moisture, which can help shingles last longer in the damp Pacific Northwest climate.
- Starter shingles and roofing material must be installed in sequence: Each layer supports the next one, so following the correct roof replacement steps is important for a watertight finish.
- A final inspection and cleanup should always be part of the job: A professional crew should check the finished roof, remove debris, and use a magnetic nail sweep to help leave the property safe and clean.
With these roof replacement steps in mind, you can better understand what a quality project should include from start to finish. The full article will walk through each stage in more detail so you know how Roof Pros NW approaches a professional roof installation.
Ready to Plan Your Roof Replacement?
A roof replacement is a major investment, but the right plan can make the process simple and manageable. If your roof is aging, showing repeated repair needs, or no longer protecting your home as it should, now is a smart time to explore your options with Roof Pros NW.
A professional roof replacement consultation helps you understand the condition of your current roof, compare materials, and prepare for the work before scheduling fills up.
- Get a clear assessment of your roof’s condition
- Review roofing material options for your home and budget
- Understand the replacement process and expected timeline
- Receive straightforward recommendations without pressure
- Plan ahead for a smoother installation experience
Take the next step toward a dependable new roof by booking your roof replacement consultation with Roof Pros NW today.
What happens during a professional roof replacement?
A professional roof replacement starts with planning and material delivery, then the old roofing is torn off so the deck can be inspected. Any damaged decking is repaired before new underlayment, drip edge, flashing, starter shingles, and the main roofing material are installed. The crew should also check ventilation, then finish with cleanup, debris removal, and a final inspection. This process matters because each layer supports the next and helps the roof handle rain, wind, and moisture for years. If you want to know what your roof needs, contact Roof Pros NW for an inspection or estimate.
How do I know if I need roof repair or roof replacement?
A repair may be enough if the damage is small, local, and the roof is otherwise in good shape. A replacement is often the better choice when the roof is older, leaks keep coming back, shingles are failing in multiple areas, or the deck has damage under the surface. The best way to decide is to have the roof inspected so the condition of the shingles, flashing, underlayment, and decking can be reviewed together. Roof Pros NW can help you understand whether repair or replacement makes more sense.
What should be included in a roof replacement estimate?
A good roof replacement estimate should clearly explain the scope of work, the roofing materials, tear-off details, deck repair expectations, underlayment, flashing, drip edge, ventilation work, cleanup, and the final inspection process. It should also tell you what is included if hidden damage is found after tear-off. Clear estimates help you compare bids fairly and avoid surprises later. If you want a detailed estimate for your home, contact Roof Pros NW.
Will my roof decking need repairs during replacement?
Not always, but decking repairs are common when old leaks, soft spots, rot, or water stains are found during tear-off. The deck is the base of the roof system, so any damaged wood should be fixed before new materials go on. In the Pacific Northwest, steady rain and moisture can hide damage until the old roof is removed. A proper deck inspection helps protect the new roof and extend its life. Roof Pros NW can inspect the decking and explain any needed repairs.
Should flashing, underlayment, and drip edge be replaced during a roof replacement?
Yes, these parts should usually be reviewed and replaced when needed during a full roof replacement. Flashing protects weak spots like chimneys, skylights, vents, walls, and valleys. Underlayment adds a moisture barrier below the shingles, and drip edge helps direct water away from the roof edge and fascia. Reusing worn or damaged parts can shorten the life of the new roof and raise the risk of leaks. A professional replacement should include these details as part of the system, not as an afterthought.
