Roof Replacement Steps: What Homeowners Should Expect
A new roof is more than a layer of shingles. It is a complete system of materials and details working together to direct water away from your home, protect the roof structure, and hold up through years of rain, wind, and changing temperatures. That is why a roof replacement can feel like a major project, especially if you are unsure what happens after the crew arrives or how long the work may take.
Knowing the roof replacement steps ahead of time makes the project easier to plan for and easier to evaluate. You will know why a contractor begins with a close inspection, what happens during a roof tear-off, and why damaged decking cannot be ignored. You will also have a clearer picture of the parts that are not always visible from the ground, including roofing underlayment, drip edge, flashing, water barriers, and ventilation. Each one plays a role in helping your roof manage moisture and perform as intended.
This matters throughout the Pacific Northwest, where long wet seasons can expose small roofing weaknesses quickly. Wind-driven rain can work its way into poorly sealed valleys, damaged flashing, or worn roof edges. Moss can hold moisture against roofing materials. If water reaches the decking or attic, the damage may spread beyond the roof to insulation, ceilings, walls, and framing. A careful replacement process helps address these concerns before the new roof is installed, rather than simply covering an older problem.
Material selection also deserves more thought than many homeowners expect. Roofing type, color, warranty options, slope, drainage, and local weather conditions can all affect the best choice for your property. A home with heavy tree cover, for example, may need a different maintenance plan than a home exposed to stronger winds. Property managers and owners of older homes may also need to consider access, tenant communication, parking, and protecting outdoor areas while work is underway.
The installation day itself can be noisy and active. Crews remove old materials, inspect the roof decking, replace problem areas when needed, and install the layers that help keep water out. Once the main shingle installation is complete, the work should include ridge caps, flashing replacement around chimneys and vents, cleanup, and a magnetic sweep for nails. A final roof walkthrough gives you the chance to review the finished work, ask questions, and understand any warranty information.
Whether your current roof is leaking, nearing the end of its lifespan, or showing widespread wear, understanding what to expect during a roof replacement in the Pacific Northwest can help you make informed decisions and prepare your home with confidence. The following guide walks through the roof replacement process from the first inspection to the final cleanup, including practical tips for working with Roof Pros NW.
Why It Helps to Know the Roof Replacement Process
A roof replacement is more than putting new shingles on a house. It is a full system project that can include removing old materials, checking the roof decking, installing water barriers, replacing flashing, improving ventilation, and finishing the roof edges and ridges.
Knowing the roof replacement steps helps homeowners plan for the work, ask better questions, and understand why each part of the project matters. This is especially helpful in the Pacific Northwest, where long wet seasons, wind, moss, and moisture can expose weak points in an older roof.
A clear plan also makes the homeowner experience easier. You can prepare for noise, arrange parking, protect outdoor spaces, and make plans for pets or tenants before the crew arrives. For a closer look at local project planning, review these roof replacement steps for Puget Sound homeowners.
Step 1: Start With a Full Roof Inspection
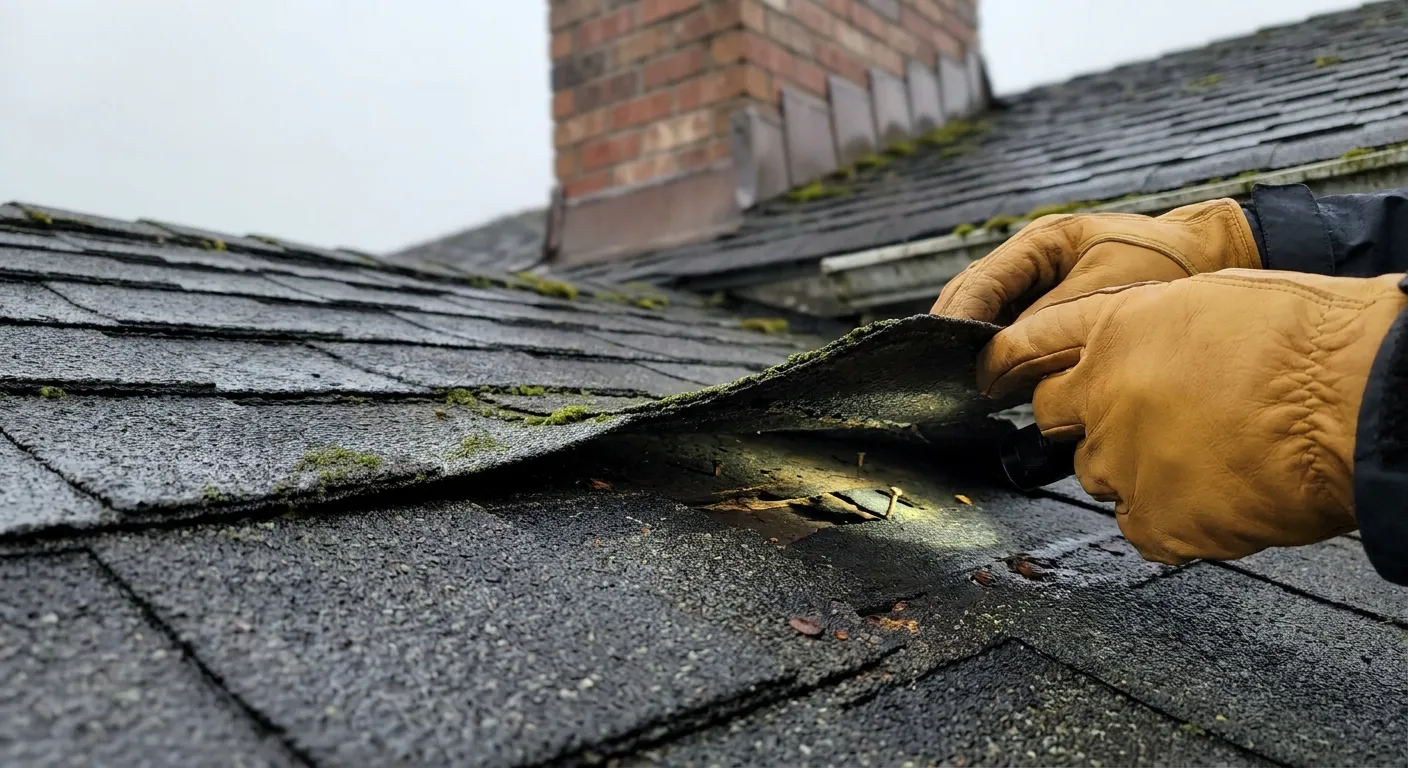
The first step in a roof replacement process is a detailed roof inspection. A roofing professional reviews the roof’s age, condition, materials, slope, drainage, and visible damage. The goal is to determine whether repairs are still practical or whether a full replacement is the better long-term option.
During the inspection, the contractor may look for:
- Missing, cracked, curled, or worn shingles
- Moss and algae growth
- Loose or damaged flashing around chimneys, walls, skylights, and vents
- Soft spots that may point to damaged roof decking
- Signs of leaks in the attic or on interior ceilings
- Poor ventilation or blocked intake and exhaust vents
- Gutter issues that may affect roof drainage
In the Pacific Northwest, moisture can remain trapped beneath aging shingles or around roof penetrations. Moss can also hold water against the roof surface. A visual inspection helps identify obvious concerns, while the roof tear-off later gives the crew a chance to inspect hidden areas more closely.
The inspection is also the time to discuss your goals. You may want to improve curb appeal, resolve recurring leaks, prepare a property for sale, or replace a roof near the end of its expected lifespan. Homeowners in the Bellevue area can learn more through this comprehensive guide to roof replacement in Bellevue.
Step 2: Choose the Right Roofing Materials and Options
Once replacement is recommended, the next step is choosing materials that fit the home, roof design, budget, and local weather conditions. Asphalt shingles are a common choice for sloped residential roofs because they come in many colors and styles. Other homes may use metal roofing, cedar, tile, or specialty materials.
Material selection should include more than the visible roof covering. A complete new roof installation may also involve underlayment, flashing, vents, drip edge, ridge caps, and water barriers. These components work together to guide water away from vulnerable areas.
When comparing options, consider:
- The roof’s slope and shape
- Wind exposure and nearby trees
- The amount of shade and potential for moss growth
- Color and style preferences
- Maintenance needs
- Compatibility with the existing roof structure
- Manufacturer warranty requirements
For a low-slope or flat roof section, the material choice may be different from the shingles used on the main roof. This overview of the best materials for flat roof replacement can help property owners understand why the roof’s design matters.
Choosing materials early allows the project plan to move into permits, ordering, and scheduling.
Step 3: Handle Permits, Scheduling, and Material Delivery Early
Some roof replacements require a roofing permit, depending on local building rules and the scope of work. Permit needs can vary based on the city, structural changes, and whether the project includes items such as skylights or major ventilation modifications. A contractor should explain who will handle the permit process and what the timeline may look like.
Scheduling also depends on weather, material availability, crew availability, and the size of the roof. Pacific Northwest weather requires careful planning. Roofing crews watch forecasts closely because exposed roof areas need protection from rain. Light moisture may delay certain steps, while steady rain or high winds can require work to pause for safety and proper installation.
Materials are often delivered shortly before the project begins. Shingles, underlayment, and other supplies may be placed in the driveway or another approved location. Before delivery, ask where materials will go and whether the weight of the delivery should be kept off certain surfaces.
If you are estimating the budget alongside the project schedule, this guide to roof replacement Bellevue costs, materials and what to expect explains common factors that can affect pricing.
Step 4: Prepare Your Home Before the Crew Arrives
Knowing how to prepare for a roof replacement as a homeowner can reduce stress on project day. Roof work is noisy and creates vibration inside the home, especially during the roof tear-off. A few simple steps help protect your belongings and make access easier for the crew.
Before work begins, move vehicles out of the garage and driveway if requested. The crew may need this area for a dumpster, material handling, or safe access to the roof. Parking on the street or arranging alternate parking can also prevent nails or debris from getting near vehicles.
Homeowners should also prepare the exterior by:
- Moving patio furniture, grills, toys, planters, and decorations away from the home
- Covering or relocating delicate plants near the work area when possible
- Keeping gates unlocked if the crew needs backyard access
- Marking sprinkler heads, landscape lighting, or other hard-to-see features
- Securing loose items that could be affected by vibration or wind
- Removing wall hangings or fragile items inside if they are likely to shift
Pets often find roofing noise stressful. Consider keeping dogs and cats in a quiet interior room, taking them to a trusted caregiver, or planning time away from the home during the loudest parts of the day. Families with infants, remote workers, or people sensitive to noise may also prefer to make alternate plans.
Property managers should notify tenants well before the work starts. Give them expected work hours, parking instructions, access details, and a reminder to keep windows closed during tear-off. It is also courteous to tell nearby neighbors about the planned noise and temporary activity.
These practical steps make it easier for the crew to begin the physical roofing work safely.
Step 5: Roof Tear-Off Begins
The roof tear-off is the removal of old shingles and other worn roofing materials. Depending on the roof’s condition and local requirements, this may include removing one or more existing layers. A full tear-off allows the roofing crew to inspect the roof structure rather than covering possible problems with new materials.
During this stage, crews remove old shingles, underlayment, damaged flashing, and roofing debris. The work can be loud because shingles are lifted, nails are removed, and materials are moved from the roof to disposal containers.
Once the old materials are removed, the crew completes a roof decking inspection. Roof decking is the wood layer attached to the rafters or trusses beneath the roofing materials. It provides the base for the new roof system.
The decking is checked for rot, water damage, soft areas, gaps, and loose sections. If damaged wood is found, it may need replacement before the new roof can be installed. This is an important reason why the final scope can sometimes change after tear-off. Hidden moisture damage is not always visible from the ground or from inside the attic.
A careful decking inspection creates a solid base for the water-resistant layers that come next.
Step 6: Install Drip Edge, Underlayment, and Water Barriers
After the roof decking is prepared, the crew begins installing protective layers. These materials do not always show once the roof is finished, but they are essential parts of the roof replacement process.
Drip edge installation is usually one of the first steps. Drip edge is a metal strip placed along roof edges to direct water away from the roof deck and fascia boards. It helps control water runoff and supports cleaner drainage into gutters.
Next comes roofing underlayment. This is a protective layer installed between the roof deck and shingles. It acts as a secondary barrier if wind-driven rain gets beneath the outer roofing material.
In vulnerable areas, crews may install ice and water shield. Despite its name, this self-adhering membrane is useful in wet climates because it helps protect areas where leaks are more likely, such as:
- Roof valleys where two slopes meet
- Eaves and edges
- Areas around skylights
- Chimneys and wall transitions
- Other roof penetrations
For homeowners wondering what to expect during a roof replacement in the Pacific Northwest, these moisture-control layers are especially important. Heavy rain and recurring damp conditions make proper installation details just as important as the shingles themselves.
Step 7: Replace Flashing and Check Roof Ventilation
Flashing replacement is another key part of the new roof installation steps. Flashing is shaped metal used to seal areas where the roof meets another surface or where an object passes through the roof. Common flashing locations include chimneys, plumbing vents, skylights, dormers, and sidewalls.
Old flashing may be corroded, bent, poorly installed, or sealed with aging caulk. Replacing or correctly integrating flashing into the new roof system helps guide water away from these transition points.
The crew should also check roof ventilation. A balanced ventilation system allows air to move through the attic, usually through intake vents near the eaves and exhaust vents near the ridge. Good ventilation helps manage heat and moisture in the attic.
In a damp region, attic moisture can contribute to condensation and affect insulation, framing, and roof materials over time. Ventilation is not a substitute for fixing leaks, but it is an important part of maintaining a healthy roofing system.
These details are often less visible than shingles, yet they play a major role in how the roof handles changing weather.
Step 8: Install Shingles and Complete the Main Roof Surface
Once the protective layers, flashing, and ventilation details are in place, shingle installation can begin. The crew starts at the lower edge of the roof and works upward in overlapping rows. This overlap is designed to shed water toward the gutters rather than allowing it to travel beneath the shingles.
Proper alignment, fastening, and spacing matter. Shingles must be installed according to the manufacturer’s instructions and suited to the roof’s slope and local wind conditions. Valleys, roof edges, vents, and intersections require extra attention because they handle larger amounts of runoff or have more complex shapes.
During this portion of the project, the roof begins to look finished. However, the system still needs its final cap pieces and detail work. For a broader overview of this phase, see the complete guide to new roof installation in Bellevue.
Step 9: Finish With Ridge Caps and Final Roofing Details
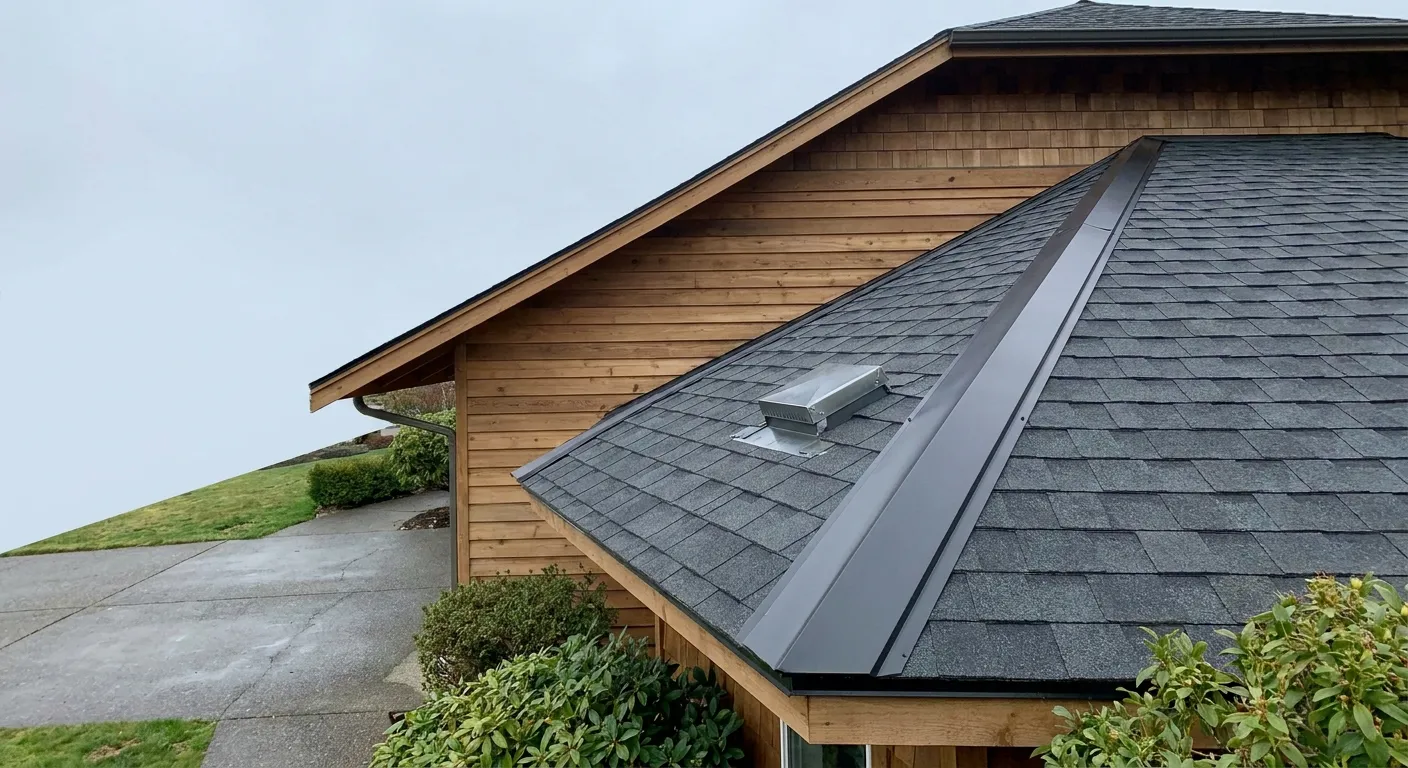
After the main roof surface is installed, the crew completes the ridge caps and other finishing details. Ridge cap shingles cover the peak, or ridge, of the roof. They protect the top joint where roof slopes meet and provide a clean finished appearance.
If the roof uses ridge ventilation, the ridge vent is installed before the ridge cap shingles. This allows warm, moist air to leave the attic while keeping rain out.
The crew also finishes details around vents, chimneys, skylights, and roof-to-wall connections. Gutters may be checked to make sure roof runoff will flow properly. Depending on the project scope, damaged gutter components or roof-edge trim may need separate repair or replacement.
These final roofing details bring the system together before cleanup and review begin.
Step 10: Cleanup Should Be Part of the Job
Cleanup is a meaningful part of what to expect during roof replacement, not an afterthought. Tear-off debris, old nails, packaging, and small pieces of shingle can collect around the home during the workday.
A professional cleanup process generally includes removing debris from the roof, driveway, yard, and work areas. Crews may use magnetic tools to collect loose nails from accessible ground areas. They should also remove the disposal container and remaining materials when the work is complete.
Homeowners can help by keeping children and pets away from the work zone until the crew confirms the area is clear. Before returning patio furniture or outdoor items, take a moment to inspect the area around the home and let the contractor know if you have questions.
Landscaping near the house may be temporarily covered or protected, but it is helpful to remember that roof debris must travel down from above. Moving fragile containers and informing the crew about special plants before work starts is the best way to reduce avoidable issues.
With the site cleaned, the project can move to the final roof walkthrough.
Step 11: Final Walkthrough and Quality Review
The final roof walkthrough gives the homeowner and contractor a chance to review the completed work. This is the time to confirm the project scope, discuss the installed materials, and ask questions about care and maintenance.
During the final roof walkthrough, ask about:
- The condition of roof decking after tear-off
- Any repairs completed during the project
- Flashing and ventilation work
- Warranty information for materials and workmanship
- Recommended maintenance practices
- How to watch for future moss growth or drainage concerns
- Any remaining items, such as gutter work or exterior repairs
You do not need to climb on the roof yourself. A contractor can explain the work from the ground, provide photos when available, and point out important components. Keep copies of your contract, warranty documents, receipts, and permit records for future reference or a property sale.
How Long Roof Replacement Takes and What Can Affect the Timeline
Homeowners often ask, “How long does a roof replacement take for a residential home?” The answer depends on the roof’s size, complexity, accessibility, material type, weather, and the amount of repair needed after tear-off.
A straightforward residential roof may be completed in a few days, while a larger or more complex roof can take longer. Roofs with steep slopes, multiple levels, skylights, chimneys, valleys, or extensive decking repairs generally require additional time.
Common timeline factors include:
- Rain, high winds, or unsafe weather conditions
- Material delivery timing
- Permit processing
- Hidden decking damage found after tear-off
- The number of old roofing layers being removed
- Limited access for equipment and debris removal
- Specialty materials or custom flashing needs
Weather planning is particularly important during Pacific Northwest wet seasons. A responsible contractor protects exposed areas and may adjust the schedule when conditions would affect safe, quality installation. Flexibility is helpful, but clear communication should keep homeowners informed about any schedule changes.
Questions Homeowners Should Ask Before Replacing a Roof
A roofing contractor checklist can help you compare proposals and understand the scope before signing an agreement. The best questions are specific and practical, covering materials, installation details, communication, and cleanup.
Questions to ask a roofing contractor before replacing your roof include:
- Is a full tear-off included, and how many existing layers will be removed?
- Will you inspect the roof decking, and how are needed repairs handled?
- What type of roofing underlayment and ice and water shield will be used?
- Will flashing be replaced or reused where possible?
- How will roof ventilation be evaluated?
- Who handles the roofing permit if one is required?
- Where will materials and disposal containers be placed?
- How should I prepare my vehicles, landscaping, pets, and outdoor belongings?
- What is the expected work schedule, and how will weather delays be communicated?
- How is cleanup handled, including nail collection?
- What warranties apply to the materials and installation?
Clear answers help property owners understand what are the steps in a roof replacement process and what responsibilities belong to each party. To discuss a specific roof, schedule, materials, or replacement plan, book a roof replacement consultation with Roof Pros NW.
Conclusion
Understanding the roof replacement process gives homeowners a much clearer path from the first inspection to the final walkthrough. A roof replacement is not just about new shingles. It involves checking the roof deck, replacing worn flashing, installing underlayment and water barriers, improving ventilation, and making sure the finished system is built to handle local weather. In the Pacific Northwest, where rain, moisture, wind, and moss can all wear down a roof over time, these details matter even more.
One of the biggest takeaways is that a good replacement starts with a full inspection. That step helps determine whether repair is still an option or whether the roof has reached the point where replacement makes more sense. It also helps uncover problems that are not always easy to see from the ground, such as soft decking, hidden leaks, poor drainage, or aging flashing around roof openings. When those issues are found early, property owners can make a more informed choice and avoid guessing about the roof’s condition.
The article also shows that material selection is a major part of the process. The right roofing system depends on the roof shape, slope, exposure to wind and trees, and long-term maintenance needs. For some homes, asphalt shingles may be the best fit. For others, different roofing materials or flat roof options may be more appropriate. Either way, the underlayment, drip edge, flashing, and ridge details all work together to protect the home, not just the outer layer you can see.
Preparation is another step that can make the project go more smoothly. Moving vehicles, protecting landscaping, planning for pets, and letting tenants or neighbors know about the work can reduce stress during tear-off and installation. These simple steps help keep the site safer and make it easier for the crew to focus on the roof itself.
Cleanup and the final walkthrough are just as important as the installation. A finished roof should come with a clean work area, a review of the completed project, and clear information about warranties and maintenance. That final conversation is a good time to ask about any repairs made during the job, future care needs, and what signs to watch for later.
If you are still deciding whether your roof needs repair or replacement, the next step is to get a professional opinion before small issues become bigger ones. For homeowners comparing project steps and local planning needs, this roof replacement steps for Puget Sound homeowners guide is a helpful place to start. If you are ready to move forward, book a roof replacement consultation with Roof Pros NW to review your roof, discuss your options, and plan the right next step for your home.
Before a roof replacement begins, it helps to know what the full process looks like from start to finish. These key takeaways explain the main steps, common homeowner questions, and a few practical day-of details so you can feel prepared, stay organized, and know what to expect when working with Roof Pros NW.
- Start with a full roof inspection: A good replacement project begins with checking shingles, flashing, decking, ventilation, and any leak or moisture damage so the crew knows what needs attention.
- Choose the right materials for your home and climate: Roofing type, color, warranty tier, and weather performance all matter, especially in the Pacific Northwest where rain and moss can affect roof life.
- Permits and scheduling should be handled early: A roofing contractor may need to pull permits, coordinate materials, and set a clear install date so the project runs smoothly.
- Tear-off reveals what is happening under the old roof: Once the old roofing is removed, the crew can inspect the decking and replace any damaged wood before moving forward.
- Underlayment and water barriers add key protection: Drip edge, roofing underlayment, and ice and water shield help defend the roof from leaks, wind-driven rain, and moisture.
- Flashing and ventilation must be replaced the right way: Chimneys, vents, valleys, and other roof joints need proper flashing, while ventilation helps support roof performance and lifespan.
- Shingle installation and ridge caps finish the system: Once the main roofing is installed, ridge caps and final details help seal and complete the roof for long-term protection.
- Cleanup should be part of the job, not an extra step: A proper replacement includes debris removal, a magnetic nail sweep, and checking the yard, driveway, and gutters for leftover material.
- Prepare your home for noise and disruption: Roof replacement can be loud, and homeowners should plan for pet stress, parking changes, and moving outdoor items or fragile belongings before work starts.
- A final walkthrough confirms the work is complete: The last step should include a quality check, a review of finished details, and time to ask questions about the new roof and any warranty coverage.
With these steps in mind, the rest of the article will walk through the roof replacement process in a simple, helpful way so you know how to prepare and what a professional roofing project should include.
Plan Your Roof Replacement With Confidence
If your roof is showing signs of age, damage, or repeated repair needs, a clear plan can help you avoid last-minute decisions. Roof Pros NW offers roof replacement consultations and estimates designed to give you the information you need before moving forward.
A professional assessment can help you understand your roof’s condition, material options, and expected project scope. Scheduling early also gives you more time to compare choices and plan around your household schedule.
- Get a detailed review of your current roof
- Learn which roofing materials fit your home and budget
- Identify concerns that may affect replacement timing
- Receive a clear estimate with no guesswork
- Discuss a replacement plan built around your needs
Take the next step toward a dependable new roof by scheduling your roof replacement consultation with Roof Pros NW.
How much does roof replacement cost for a typical home?
Roof replacement pricing depends on roof size, pitch, material choice, tear-off needs, decking repairs, flashing replacement, ventilation work, access, and local labor. A simple roof with little hidden damage costs less than a steep or complex roof with repair needs. The best way to get a fair price is to have the roof inspected and ask for a written estimate from Roof Pros NW.
How long does a residential roof replacement usually take?
Most residential roof replacements take several days, but the timeline depends on roof size, weather, material type, roof complexity, and any damage found after tear-off. A simple job moves faster than a roof with steep slopes, multiple levels, skylights, or decking repairs. Roof Pros NW can inspect the roof and give you a clearer schedule before work begins.
Do I need a full roof replacement, or can I get by with repairs?
That depends on the roof’s age, the amount of wear, and whether the damage is limited to one area or spread across the roof. Small leaks, a few damaged shingles, or isolated flashing problems may be repairable. If the roof has widespread wear, repeated leaks, soft decking, or failing materials, replacement is often the better long-term choice. Roof Pros NW can inspect the roof and help you decide.
What should I ask before hiring a roofing contractor?
Ask who will inspect the decking, whether a full tear-off is included, what underlayment and water barriers will be used, how flashing and ventilation will be handled, what cleanup is included, and what warranty comes with the work. You should also ask how weather delays are handled and who is responsible for permits. Clear answers help you compare contractors with confidence, and Roof Pros NW can walk you through the process.
What cleanup should a roofing company include after a roof replacement?
Cleanup should include removing old roofing debris, checking the yard and driveway for scraps, doing a magnetic nail sweep, and leaving gutters and walkways in safe condition. A proper cleanup is part of the job, not an extra favor. Before the crew leaves, make sure the area around the home has been checked and ask any final questions during the walkthrough.
