Flat Roof Replacement Timeline: What to Expect Step by Step
A flat roof replacement is not just the day a new membrane goes on. Much of the work that protects your home or building happens before installation begins, including the inspection, material planning, tear-off, and repairs to the surface beneath the old roof. Knowing what happens at each stage can make the project feel far more manageable, especially when you need to plan around tenants, daily routines, building access, or changing weather.
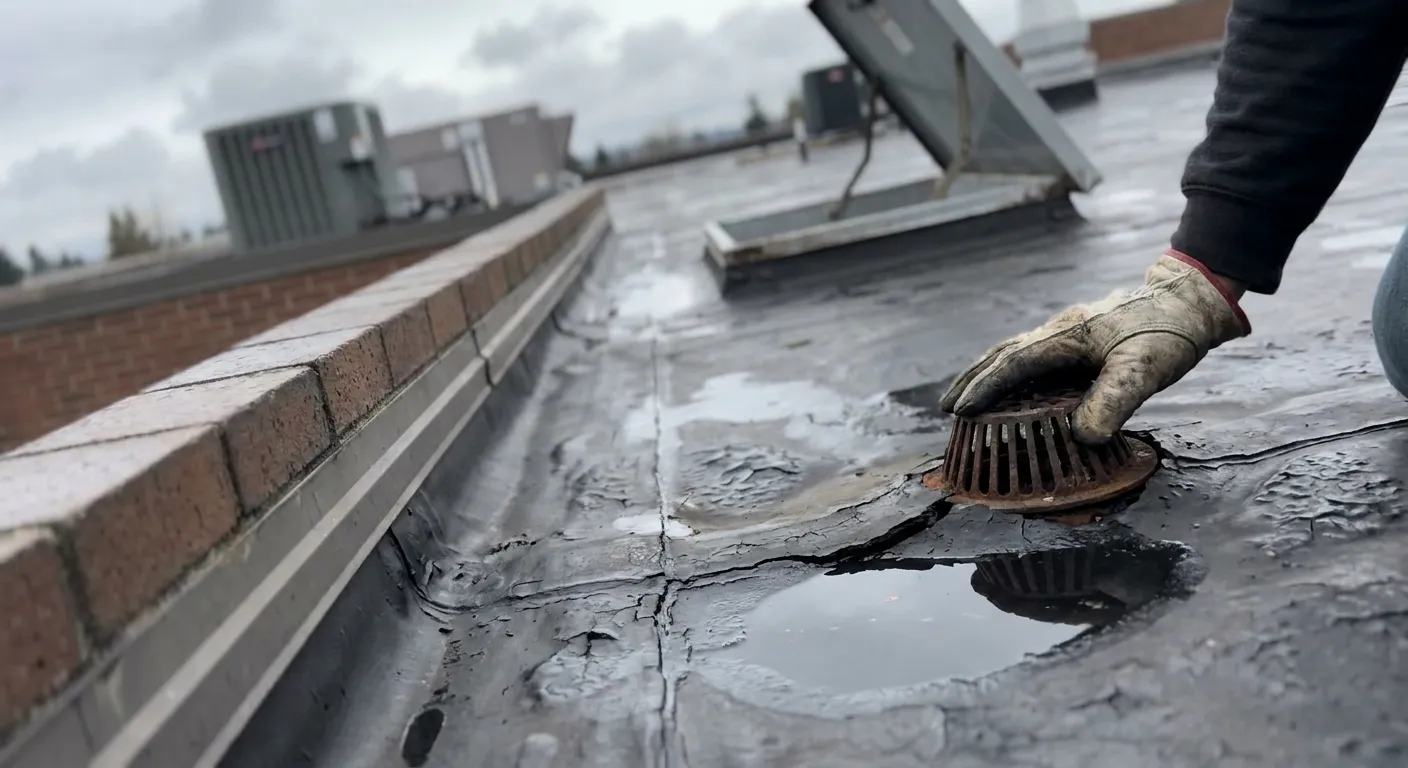
For property owners in the Pacific Northwest, a clear plan matters. Long wet seasons, wind, and steady moisture can make existing flat roof problems worse and can also affect when certain parts of the work can safely move forward. A roof with leaks, ponding water, damaged flashing, or soft areas may need more than a new waterproofing membrane. Once the old material is removed, the crew may find wet insulation, rotted roof decking, or drainage concerns that must be addressed before the new system is installed. Taking care of these issues helps the new roof perform as intended and reduces the risk of water damage below.
So, how long does flat roof replacement take? The answer depends on the size and layout of the roof, the condition of the materials underneath, permit requirements, weather, and the type of roofing system selected. TPO roofing installation, an EPDM flat roof, modified bitumen roofing, and built-up roofing each have their own installation methods and material needs. Some projects can move quickly once work begins, while others need added time for ordering materials, repairs, inspections, or dry weather windows.
The flat roof replacement timeline also includes details that are easy to overlook from the ground. Crews may need to protect the property during tear-off, remove and dispose of old materials, inspect the deck, improve insulation, seal penetrations, replace flashing, and confirm that drains and scuppers can move water away from the roof. These steps are essential for roof lifespan, indoor comfort, and long-term protection from leaks.
A realistic schedule should allow for the expected roofing project phases as well as possible surprises. That does not mean every project will face delays. It means property owners can make smarter decisions when they understand why a careful inspection and proper preparation matter. If you are still deciding whether replacement is necessary, reviewing the signs you need a flat roof replacement can help clarify the next step.
This guide walks through the flat roof installation process step by step, from the first assessment through the final walkthrough. You will learn what to expect during tear-off and installation, what can affect the schedule, how weather and permits fit into the plan, and what maintenance your new roof will need after the work is complete.
What a Flat Roof Replacement Timeline Really Looks Like
Why the Timeline Matters Before Work Starts
A flat roof replacement is more than the day a crew installs new roofing material. It includes inspection, planning, permits when needed, material delivery, tear-off, repairs, installation, cleanup, and a final review. Understanding these roofing project phases can reduce stress and help owners make practical plans.
A clear schedule is especially helpful for apartment buildings, commercial properties, and homes with limited access. Property managers may need to notify tenants about noise and parking changes. Business owners may need to plan around deliveries or rooftop equipment access. Homeowners may need to move vehicles and protect patio furniture or landscaping.
Knowing what to expect during a flat roof replacement project also helps everyone understand that a careful project may need adjustments along the way.
What Can Change the Schedule
Every flat roof replacement timeline depends on the building and roof condition. Weather, hidden damage, roofing permit reviews, material lead times, access limitations, and crew safety can all affect the order or pace of work.
For example, a roof that looks straightforward from the surface may have wet insulation or rotted decking underneath. Finding and correcting those problems before installing a new waterproofing membrane is responsible work, even when it adds time. The next step is a close inspection to identify likely needs before planning begins.
Step 1: Roof Inspection and Project Assessment
What a Flat Roof Inspection Includes
A flat roof inspection starts with a detailed review of the existing roof surface. A contractor typically checks the membrane, seams, flashings, roof edges, drains, scuppers, and penetrations such as vents, skylights, pipes, and rooftop equipment supports.
The inspection also looks for standing water, loose materials, punctures, open seams, and areas where the roofing system may be separating. On low-slope roofing, small details can matter because water moves more slowly than it does on a steep roof.
When possible, inspectors may also check the building interior, attic, or ceilings. Water stains, peeling paint, musty odors, or damp insulation can point to moisture problems that are not obvious from the roof surface.
Signs That Suggest Replacement May Be Needed
A repair can sometimes address a small, isolated issue. However, repeated leaks or widespread wear may mean replacement is the more practical choice. Common warning signs include:
- Persistent roof leaks or recurring water stains indoors
- Cracked, blistered, shrinking, or separating roofing material
- Soft spots, sagging areas, or signs of weakened decking
- Ponding water that remains after normal drying time
- Multiple past patches across the roof
- Damaged flashing around walls, drains, vents, or equipment
Property owners can review these signs you need a flat roof replacement before deciding whether continued repairs make sense.
How the Inspection Shapes the Timeline
The inspection provides the starting point for the flat roof project timeline. A roof with one roofing layer, solid decking, and simple details may require less preparation than a roof with several old layers, difficult access, or moisture concerns.
A careful assessment cannot uncover every hidden issue before tear-off, but it can identify risks and help set realistic expectations. This early planning creates a better foundation for selecting materials and scheduling the job.
Step 2: Material Selection and Scheduling the Job
How Different Roofing Materials Affect the Timeline
Different flat roofing systems have different installation steps. TPO roofing installation often involves rolling out membrane sheets, fastening or bonding them, and heat-welding the seams. An EPDM flat roof uses a rubber membrane that may be adhered, mechanically attached, or ballasted depending on the system.
Modified bitumen roofing uses asphalt-based sheets installed in layers, while built-up roofing also uses multiple layers of material. These systems require careful seam work and waterproofing details. Their installation methods, material handling needs, and weather requirements can affect the schedule.
Some systems may be better suited to a specific roof slope, building use, budget, or long-term maintenance plan. Material selection should consider more than the installation day.
Ordering Materials and Planning Delivery
Materials must be available before the project can begin. Standard materials may be easier to schedule, while specialty colors, insulation types, edge metal, and uncommon membrane sizes may need extra ordering time.
Large buildings can also require more deliveries and staging space. If the property has narrow access, limited parking, or a busy tenant lot, the contractor may need a plan for safely moving materials to the roof. Planning delivery before tear-off helps avoid unnecessary interruptions.
Choosing the Right System for the Building
The best roof system depends on the building design, roof slope, drainage setup, budget, and owner goals. A building with many vents and equipment curbs may need different flashing details than a simple residential garage roof.
For a closer look at common options, review best materials for flat roof replacement in 2023. Once the system is selected and materials are planned, the project can move into approvals and site preparation.
Step 3: Permits, Approvals, and Pre-Job Prep
When a Roofing Permit May Be Needed
A roofing permit may be required based on the project scope, local building rules, property type, or structural work involved. A straightforward replacement may have different requirements than a project that changes insulation thickness, drainage, roof framing, or rooftop equipment.
Permit processing can affect the start date. Property owners should ask early whether permits, homeowner association approval, or other building approvals are needed. This helps prevent a crew from arriving before the project is cleared to begin.
Preparing the Property for Roofing Work
Pre-job preparation protects the property and improves crew access. Owners may need to move vehicles from driveways or designated work areas, clear patios, and remove fragile items near exterior walls.
For multi-unit buildings, managers should give occupants notice about work hours, noise, temporary parking changes, and any access needs. Preparation may include:
- Keeping driveways or loading areas open for material delivery and debris removal
- Moving outdoor furniture, grills, planters, and decorations away from the building
- Protecting landscaping near access routes when practical
- Making rooftop access points available to the roofing crew
- Notifying tenants about noise, vibrations, and crew movement
Questions to Ask Before Work Starts
Clear communication supports a smoother project. Before work begins, ask who will be the main contact, what access is needed, how cleanup will be handled, and what safety steps will be used around the property.
It is also helpful to ask how the contractor will communicate weather delays or hidden damage. These answers prepare owners for the roof tear-off phase, where the full condition of the roof becomes visible.
Step 4: Tear-Off and Disposal of the Old Roof
What Happens During Roof Tear-Off
Roof tear-off is the removal of old roofing layers, worn membrane, underlayment, and related debris. The crew works in planned sections so the exposed area can be protected as needed. Materials are moved to disposal containers or trucks according to the job setup.
The work can be noisy, and occupants may notice vibration inside the building. Tear-off also creates the most debris, which is why parking access, safety barriers, and daily cleanup plans matter.
Why Tear-Off Takes Time
The time needed for tear-off depends on roof size, access, the number of existing layers, and the condition of those layers. Wet material can be heavier and harder to remove. A roof with many penetrations, walls, drains, or equipment curbs also requires slower, more detailed removal.
Safe debris handling matters as much as speed. Crews need to avoid damaging gutters, siding, windows, landscaping, and areas below the roofline.
Hidden Problems Found After Tear-Off
Tear-off is often where hidden conditions appear. Older flat roofs can hold trapped moisture below the membrane. Once layers are removed, roofers may find rotted decking, wet insulation, deteriorated fasteners, or weak spots in the roof structure.
These discoveries are a central part of the stages of flat roof replacement explained. The new roof should not be installed over damaged materials that could affect its performance. Replacing compromised decking or insulation may change the project schedule, but it protects the quality of the work.
For more details about the scope of replacement work, see flat roof replacement services what property owners should know.
How Tear-Off Affects the Rest of the Schedule
Unexpected damage can add days to a project, particularly when new materials must be ordered or larger repairs need approval. This is not always a sign of poor planning. It is often a normal and responsible response to conditions that could not be fully seen during the first inspection.
Once old materials are removed, the roof deck can receive a closer review before installation begins.
Step 5: Deck Inspection and Repairs Before Installation
What Roofers Look for in the Deck
A roof decking inspection checks whether the surface beneath the roofing system is solid, dry, and able to support the new roof. Roofers look for rot, soft spots, loose sections, water stains, cracked panels, and structural wear around drains or penetrations.
The deck provides the base for the new membrane and insulation. If it is not stable, fasteners may not hold properly and the new roof may not perform as intended.
Why Insulation and Moisture Issues Matter
Wet insulation can lose effectiveness and hold moisture against the roof assembly. It may need replacement before the new roof is installed. If trapped moisture remains, it can contribute to future leaks, material movement, or interior moisture concerns.
Correcting moisture problems is especially important in the Pacific Northwest, where long wet seasons can place extra demand on drainage and waterproofing systems.
How Repairs Fit Into the Timeline
Small deck repairs may fit into the regular work plan. Larger areas of rot, structural damage, or saturated insulation can extend the project and may require added materials or coordination.
This step is one of the most important factors that affect flat roof replacement timeline changes. After the deck is repaired and dry, the crew can prepare the surface for the new system.
Step 6: Installing the New Flat Roof System
Preparing the Surface for the New Roof
Before installation, the roof deck must be clean, dry, and free of loose debris. Depending on the selected system, the crew may install insulation, cover board, vapor control layers, or other components before the final membrane.
Careful surface preparation helps adhesives bond correctly and allows fasteners to hold securely. It also gives the crew a stable base for consistent seam and flashing work.
TPO Roofing Installation
TPO is a single-ply membrane commonly used on low-slope roofing projects. During TPO roofing installation, sheets are placed across the roof and attached with fasteners or adhesive. Seams are heat-welded to create continuous waterproof connections.
The crew also installs compatible flashing around walls, drains, curbs, and other transitions. The exact process depends on roof layout, insulation design, and attachment method.
EPDM Flat Roof Installation
An EPDM flat roof uses a flexible rubber membrane. It may be fully adhered, mechanically attached, or installed with another approved method based on the roof design. Seams are sealed with compatible tape or adhesives rather than heat-welded like TPO.
EPDM installation has its own surface preparation and weather considerations. Material choice can affect crew time, detail work, and the sequence of installation.
Modified Bitumen Roofing and Built-Up Roofing
Modified bitumen roofing and built-up roofing use layered materials. These systems require careful overlap, seam treatment, and waterproofing at transitions. Because there are several layers, installation can take additional time compared with some single-ply options.
They can be a suitable choice for certain buildings, but the system should match the roof design and maintenance needs.
Flashing, Edges, and Penetrations
Many roof leaks begin at details rather than in the open field of the roof. Flashing protects the areas around vents, drains, skylights, walls, pipes, curbs, and rooftop equipment. Edge metal helps secure and finish the perimeter.
These details require careful measuring, cutting, sealing, and inspection. They are key parts of preventing water from reaching the roof assembly.
Drainage and Water Management Details
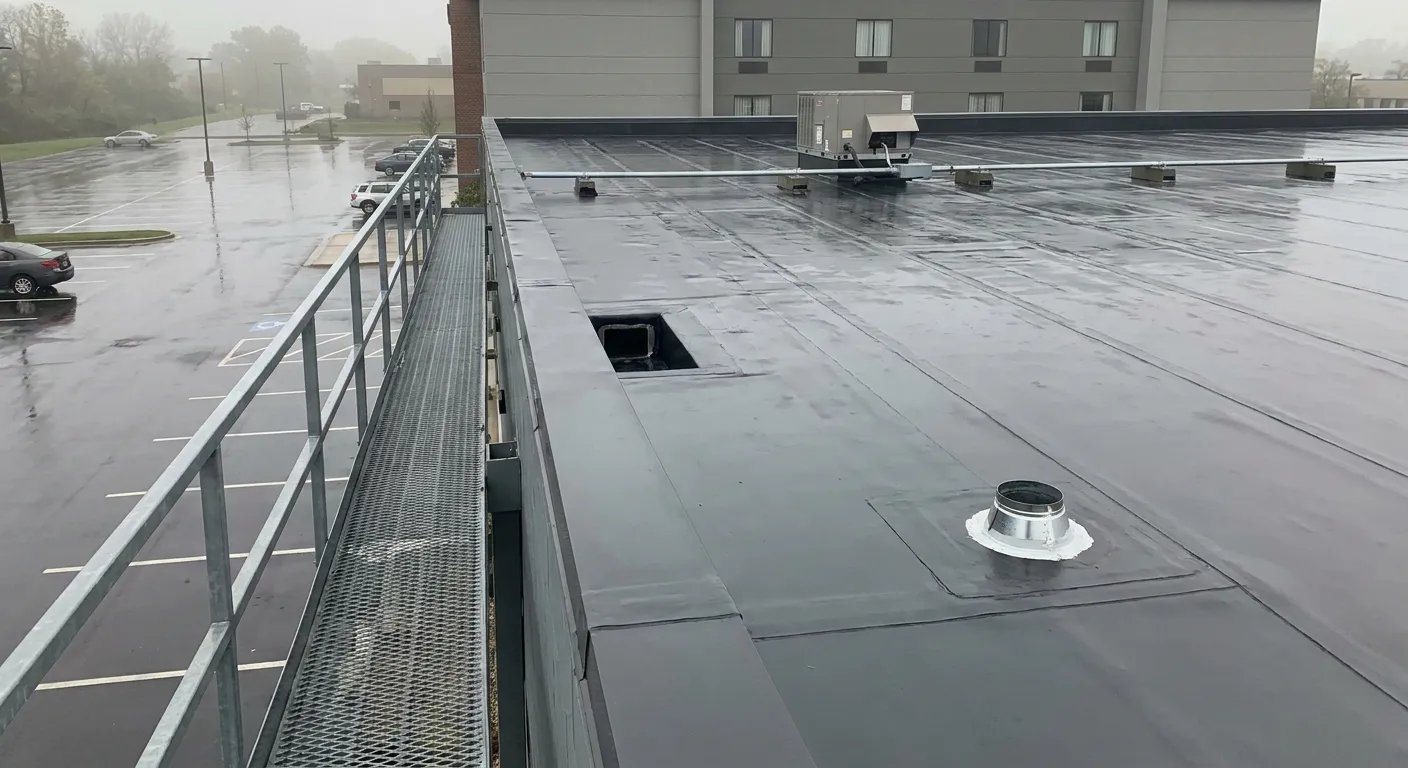
Flat roofs are designed with low slope, not no slope. Scuppers, internal drains, gutters, and tapered insulation can help guide water off the roof. The crew may check drainage paths and make sure drain openings are clear before finishing the project.
Effective drainage is especially important in the Pacific Northwest. Long rainy periods can expose drainage problems quickly, so water management should be part of every replacement plan.
What Happens on the Day of Installation
During active installation, owners and tenants may notice crew movement, material deliveries, equipment noise, and temporary changes to access around the building. The contractor should keep the work area organized and communicate any important changes.
Choosing a qualified contractor helps make these workdays easier to manage. Read how to choose the best flat roof contractors for your project before making a hiring decision.
Step 7: Weather Delays and Pacific Northwest Scheduling
Why Weather Matters So Much for Flat Roof Work
Wet surfaces can affect safety, adhesive performance, seam work, and the overall quality of a roofing installation. Rain can also make it unsafe for crews to work on a roof. High winds may limit safe material handling, especially with large membrane sheets.
A long rainy stretch does not mean the project was planned poorly. It may mean the crew is waiting for the right conditions to complete critical work correctly.
How Crews Adjust for Rain and Wind
Roofing crews may use temporary protection, cover exposed sections, adjust the order of work, or reschedule installation days when weather changes. They may complete suitable preparation work when possible, then wait to install the waterproofing membrane under proper conditions.
Communication matters here. Property owners should be told when conditions require a schedule shift and what protection is in place for the building.
Planning Around Seasonal Conditions
Pacific Northwest owners should expect some flexibility in a flat roof replacement timeline. Scheduling during drier periods can be helpful, but weather can change in any season. A realistic plan includes room for rain, wind, moisture checks, and safe work practices.
Step 8: Final Inspection and Project Closeout
What a Final Roof Inspection Covers
At closeout, the crew reviews seams, flashing, edge details, drains, seal quality, and cleanup. They may complete a punch list of small items found during the final inspection.
The goal is to confirm that roofing components are properly finished and that drainage paths are clear. The property should also be checked for stray debris, nails, and materials left near the building.
What Property Owners Should Review
Owners should walk through completed work when possible and ask questions about maintenance needs. Confirm warranty details, paperwork, and any recommended follow-up inspections.
It is also a good time to ask which drains need regular cleaning and what signs could indicate a future roof leak. This leads naturally into the care needed after replacement.
After the Replacement: Maintenance and Long-Term Care
Simple Maintenance That Helps a New Flat Roof Last Longer
A new roof still needs regular attention. Keep drains, scuppers, gutters, and roof surfaces clear of leaves, branches, and other debris. Avoid dragging sharp objects across the membrane, and limit unneeded foot traffic.
After storms, look for standing water, displaced flashing, or new debris around drains. Small concerns are generally easier to address before they become larger moisture problems.
How Often to Inspect a Flat Roof
Schedule seasonal visual checks and request a professional flat roof inspection when there are signs of damage. Extra checks after heavy rain, windstorms, or nearby tree damage can be useful.
Property managers may include roof checks in routine building maintenance. Homeowners can also watch for interior stains or damp spots that may suggest a leak needs attention.
Why Follow-Up Care Matters
Ongoing maintenance supports roof lifespan and helps protect the building below. It also gives owners a chance to catch drainage or flashing issues early.
For more information about weather and roof performance, read flat roof pros and cons how climate impacts performance.
How to Plan a Flat Roof Replacement With Fewer Surprises
Tips for a Smoother Project Timeline
The flat roof replacement process step by step for homeowners starts with planning, not tear-off. Arrange an early inspection, choose materials before the desired work date, and ask about possible permit needs. For occupied buildings, give tenants or employees advance notice and plan for access changes.
A realistic schedule is more useful than a rushed one. Leave room for material delivery, weather shifts, and the possibility of deck or insulation repairs after tear-off. This approach helps owners answer the question, “How long does a flat roof replacement take from start to finish?” with an understanding that the right answer depends on the building condition and project scope.
Questions to Ask Before Signing Off on the Plan
Before approving a replacement plan, ask the contractor:
- What is the estimated project duration, and what conditions could change it?
- Does the project require a roofing permit or other approval?
- Are materials in stock, or is there a lead time?
- How will the crew protect the building if rain arrives during tear-off?
- What happens if damaged decking or wet insulation is found?
- What access, parking, tenant notice, and cleanup arrangements are needed?
- Who should be contacted for updates during the project?
Property owners who want to discuss their roof and project planning can contact Roof Pros NW or request an assessment through booking.
Conclusion
A flat roof replacement is not just one workday. It is a step-by-step project that includes inspection, planning, permits, tear-off, repairs, installation, and final cleanup. When owners understand that process early, it becomes much easier to plan around noise, access changes, material delivery, and weather delays. That matters whether you manage an apartment building, run a commercial property, or own a home with a low-slope roof.
The biggest takeaway is that a good timeline depends on the roof’s real condition. A roof that looks simple from the outside may hide wet insulation, damaged decking, or worn flashing underneath. Those problems can slow the job, but finding them is part of doing the work correctly. In many cases, taking the time to repair the base before installing a new membrane is what helps the new roof perform as it should.
Material choice also plays a big role in the schedule and the final result. Different systems like TPO roofing installation, EPDM flat roof, and modified bitumen roofing each have their own steps, weather needs, and detailing requirements. The best option depends on the roof design, drainage setup, budget, and long-term goals. That is why it helps to compare materials before the project begins, not after the old roof is already removed.
For Pacific Northwest property owners, weather is always part of the plan. Rain, wind, and long wet stretches can affect safety and installation quality, especially during tear-off and membrane work. A realistic replacement plan should leave room for schedule changes and should include clear communication about what happens if the weather shifts. That flexibility helps protect both the building and the people using it.
After the new roof is in place, the work is not completely finished. Regular maintenance still matters. Keeping drains clear, checking flashing, and watching for standing water can help extend roof life and catch small issues before they grow. A new roof lasts longer when it is inspected and cared for on a routine basis.
If your roof is showing leaks, ponding water, worn material, or repeated patchwork, it may be time to look more closely at your options. A professional inspection can help you decide whether repair or replacement makes the most sense. If you want help planning your next step, Roof Pros NW can inspect the roof, explain your options, and help you move forward with a clear plan. You can start by learning more about flat roof replacement services or scheduling a visit through booking.
A flat roof replacement follows a clear set of steps, but the timeline can change based on weather, material availability, and what the crew finds once the old roof comes off. These key takeaways explain the main phases of the project, what can cause delays, and how to plan ahead with fewer surprises.
- Start with a full roof inspection before work begins: A careful assessment helps identify leaks, soft spots, drainage issues, and any damage that may affect the replacement plan.
- Material choice can affect the project schedule: TPO, EPDM, modified bitumen, and built-up roofing all have different installation methods and lead times for ordering supplies.
- Tear-off is a major part of the timeline: Removing the old flat roof, cleaning up debris, and preparing the surface often takes longer than many property owners expect.
- Hidden damage can add extra days to the job: Rotted decking, trapped moisture, and damaged insulation are common surprises that may need repairs before the new roof can be installed.
- Weather matters in the Pacific Northwest: Rain, wind, and long wet stretches can delay scheduling and may slow down parts of the replacement process.
- Permits and approvals can affect the start date: Some flat roof projects need permits or inspections that must be completed before installation can move forward.
- Installation includes more than just the membrane: A proper flat roof replacement may also involve flashing, insulation checks, waterproofing details, and drainage improvements.
- Final inspection helps confirm quality: The last walkthrough checks for proper sealing, clean workmanship, and any issues that should be corrected before the job is closed out.
- Maintenance still matters after the roof is done: Regular inspections, debris removal, and quick leak checks can help extend the life of the new flat roof.
- Transparent timeline planning builds trust: A clear schedule that includes possible contingency time helps homeowners and property managers prepare for real-world project delays.
With these points in mind, the full article will walk through each stage of the flat roof replacement process so you know what happens, what may change the timeline, and how to plan with confidence.
Plan Your Flat Roof Replacement With Confidence
Understanding your flat roof options is the first step. The next is getting clear advice for your own property, budget, and timeline. Roof Pros NW offers a flat roof replacement consultation and estimate to help you make a well-informed decision before small concerns become larger projects.
- Clear assessment of your flat roof’s current condition
- Material recommendations based on performance and budget
- Honest replacement options with no confusing jargon
- A detailed estimate to support confident planning
- Guidance from a team familiar with flat roofing needs
A timely consultation can help you compare your options, schedule work at a convenient time, and protect your property with the right roofing system. Whether your roof is showing age, holding water, or simply due for an update, getting professional input now makes planning easier.
Schedule your flat roof replacement consultation with Roof Pros NW today.
How long does flat roof replacement take?
A flat roof replacement usually takes more than the day the new membrane goes on. The timeline includes inspection, planning, material delivery, tear-off, deck repairs, installation, cleanup, and a final walkthrough. The exact schedule depends on roof size, roof condition, material choice, permit needs, access, and weather. In the Pacific Northwest, rain and wind can also slow the work. Roof Pros NW can inspect the roof and give you a realistic project timeline.
What should I expect during a flat roof replacement project?
You should expect a step by step process. The crew will inspect the roof, confirm the materials, prepare the site, remove the old roofing, check the decking, make needed repairs, install the new system, and finish with cleanup and a final review. You may notice noise, debris removal, and changes to roof access during the job. Clear communication before work starts helps the project run more smoothly.
What factors affect a flat roof replacement timeline?
The biggest factors are roof size, how many layers must be removed, hidden damage like wet insulation or rotted decking, material choice, permit needs, and weather. Flat roofs with leaks, ponding water, or failed flashing often need more repair time before new materials can go on. Good planning helps reduce delays, but some surprises only appear after tear-off.
Should I repair or replace my flat roof?
That depends on the roof’s age, the number of leaks, and the amount of damage. If the problem is small and isolated, a repair may be enough. If the roof has repeated leaks, soft spots, widespread wear, or damage in several areas, replacement is often the better long term choice. A professional inspection can show which option makes more sense for your property. Roof Pros NW can help you review both options.
How do I know if my flat roof needs replacement?
Common signs include recurring leaks, ponding water, cracked or blistered roofing, soft spots, sagging areas, damaged flashing, and frequent patchwork. Water stains inside the building or a roof that is near the end of its service life are also warning signs. If you are seeing more than one of these issues, it is smart to schedule an inspection before the damage spreads.
